This Shortcut Automates Sending Birthday Wishes to Your Contacts So You Never Have to Remember Again
You should know the birthday for a parent, sibling, child, or significant other, but there are just too many people in your family and contacts to remember everybody's yearly birth anniversary. Still, everyone expects you to remember their birthday. To stop looking like a jerk, go a step further than putting birthdays in your calendar and make your iPhone help you send birthday wishes when their big day pops up.
With the Automated Birthday Greetings shortcut, created by @robric18, your iPhone will scan your contact list automatically for birthdays that are there or that you've added. Then, it'll let you send a customized text or iMessage via Messages to anyone who's birthday falls on the current day. Instead of having to remember dozens or even hundreds of birthdays, this shortcut does the dirty work for you.
Step 1: Add the Shortcut on Your iPhone
Visit one of the links below to install the "ABG - Automated Birthday Greetings" shortcut. The direct link will open it up in the Shortcuts app, while the RoutineHub one will send you to the shortcut's page for more information and so that you can get the most up-to-date version.
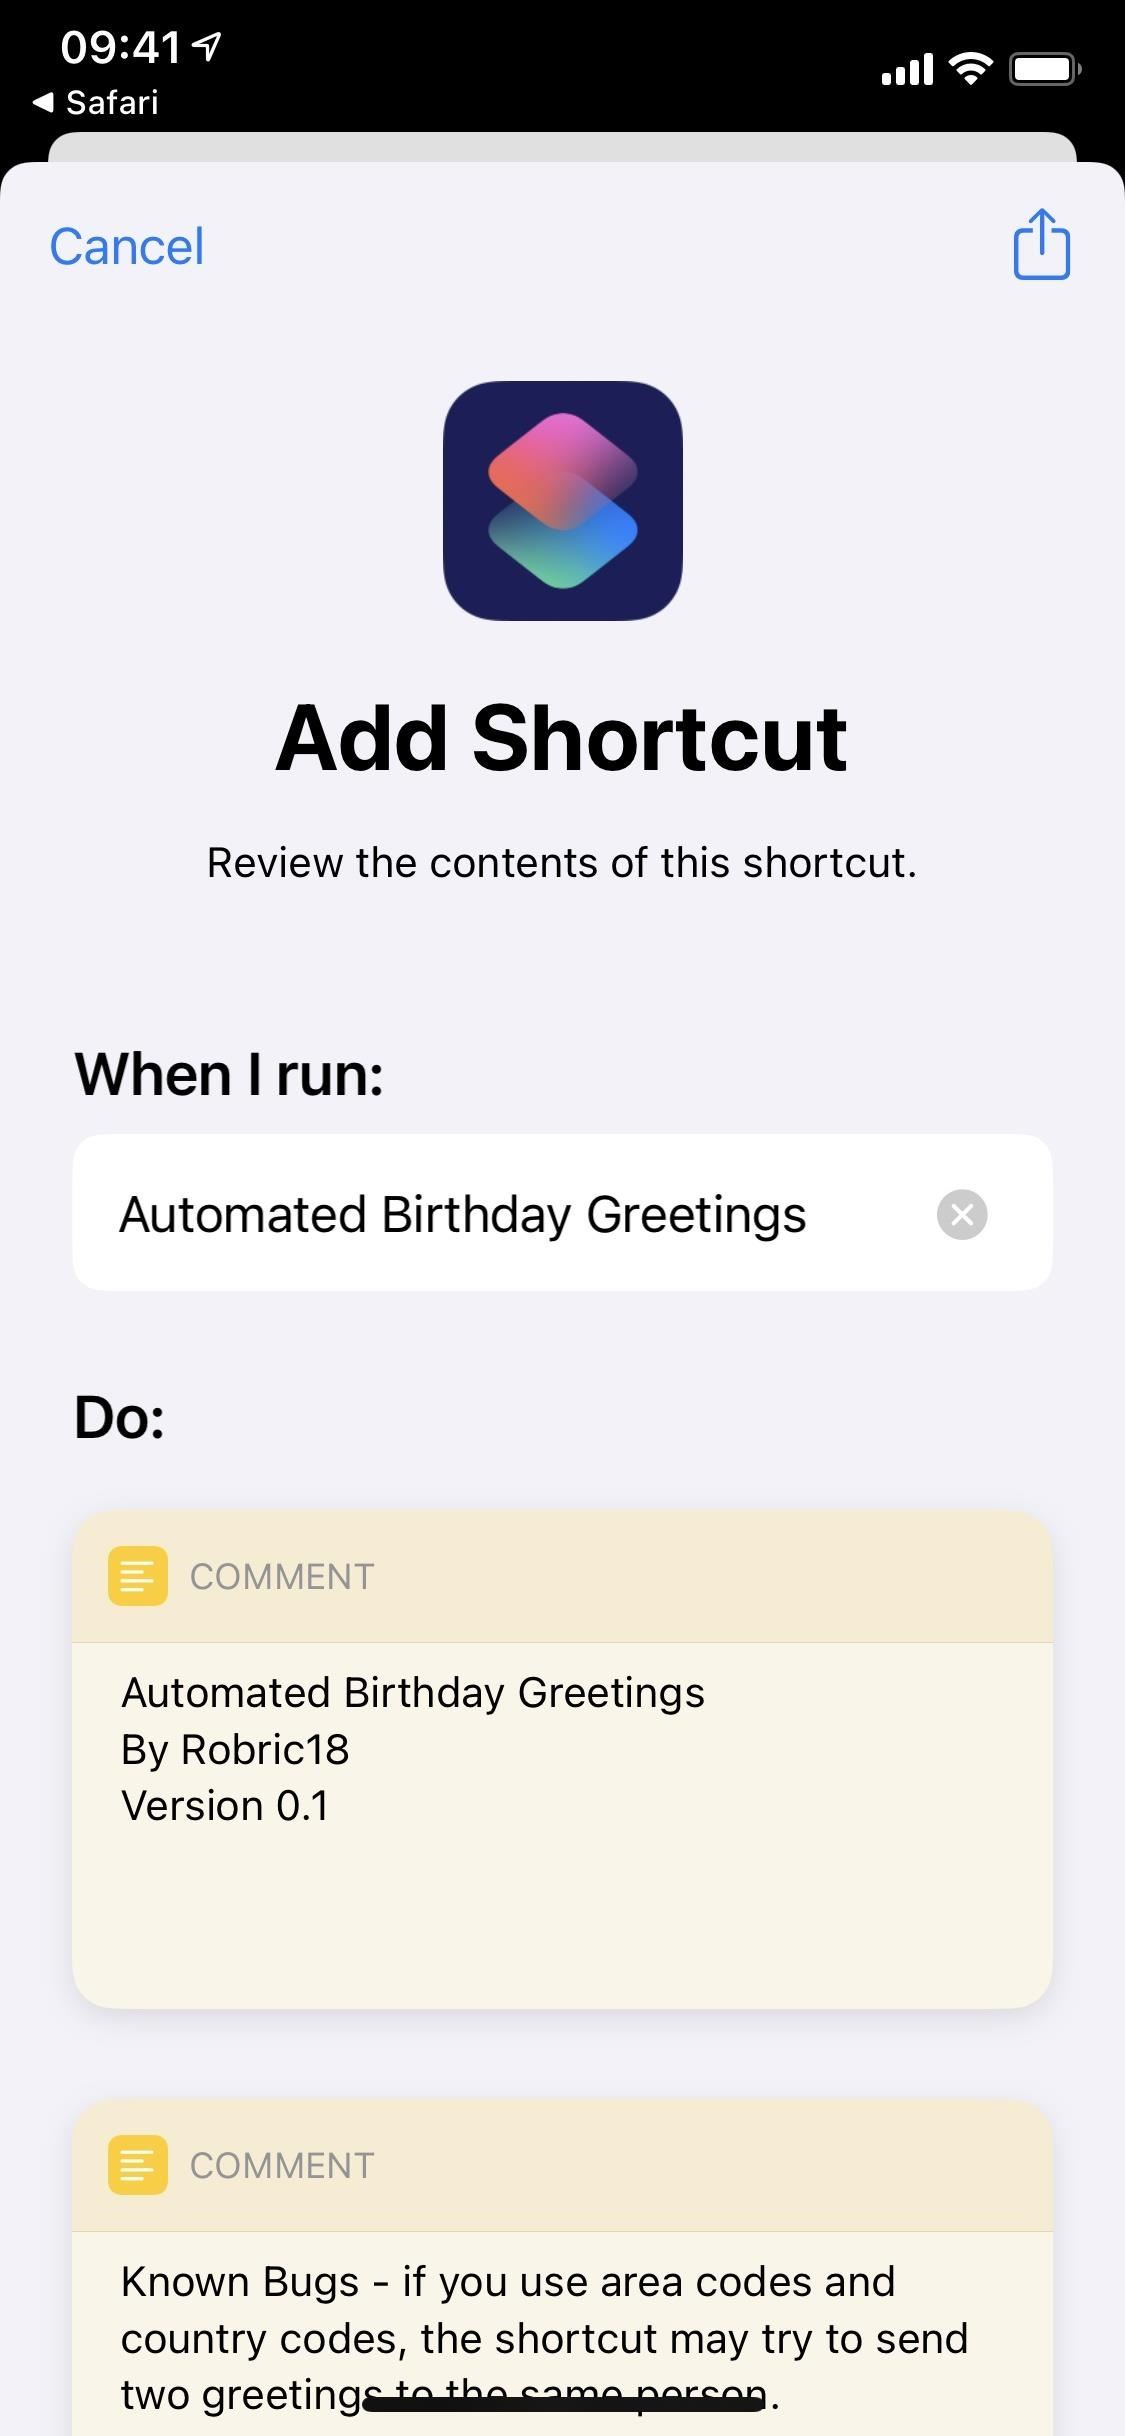
Once you get the shortcut, it'll open up in the Shortcuts app so that you can review its contents before adding to your library. If you are redirected to Safari first, tap "Get Shortcut" to view the workflow in Shortcuts. If you get an error saying that it can't be opened, go to Settings –> Shortcuts, then toggle the "Allow Untrusted Shortcuts" switch on, and try again.
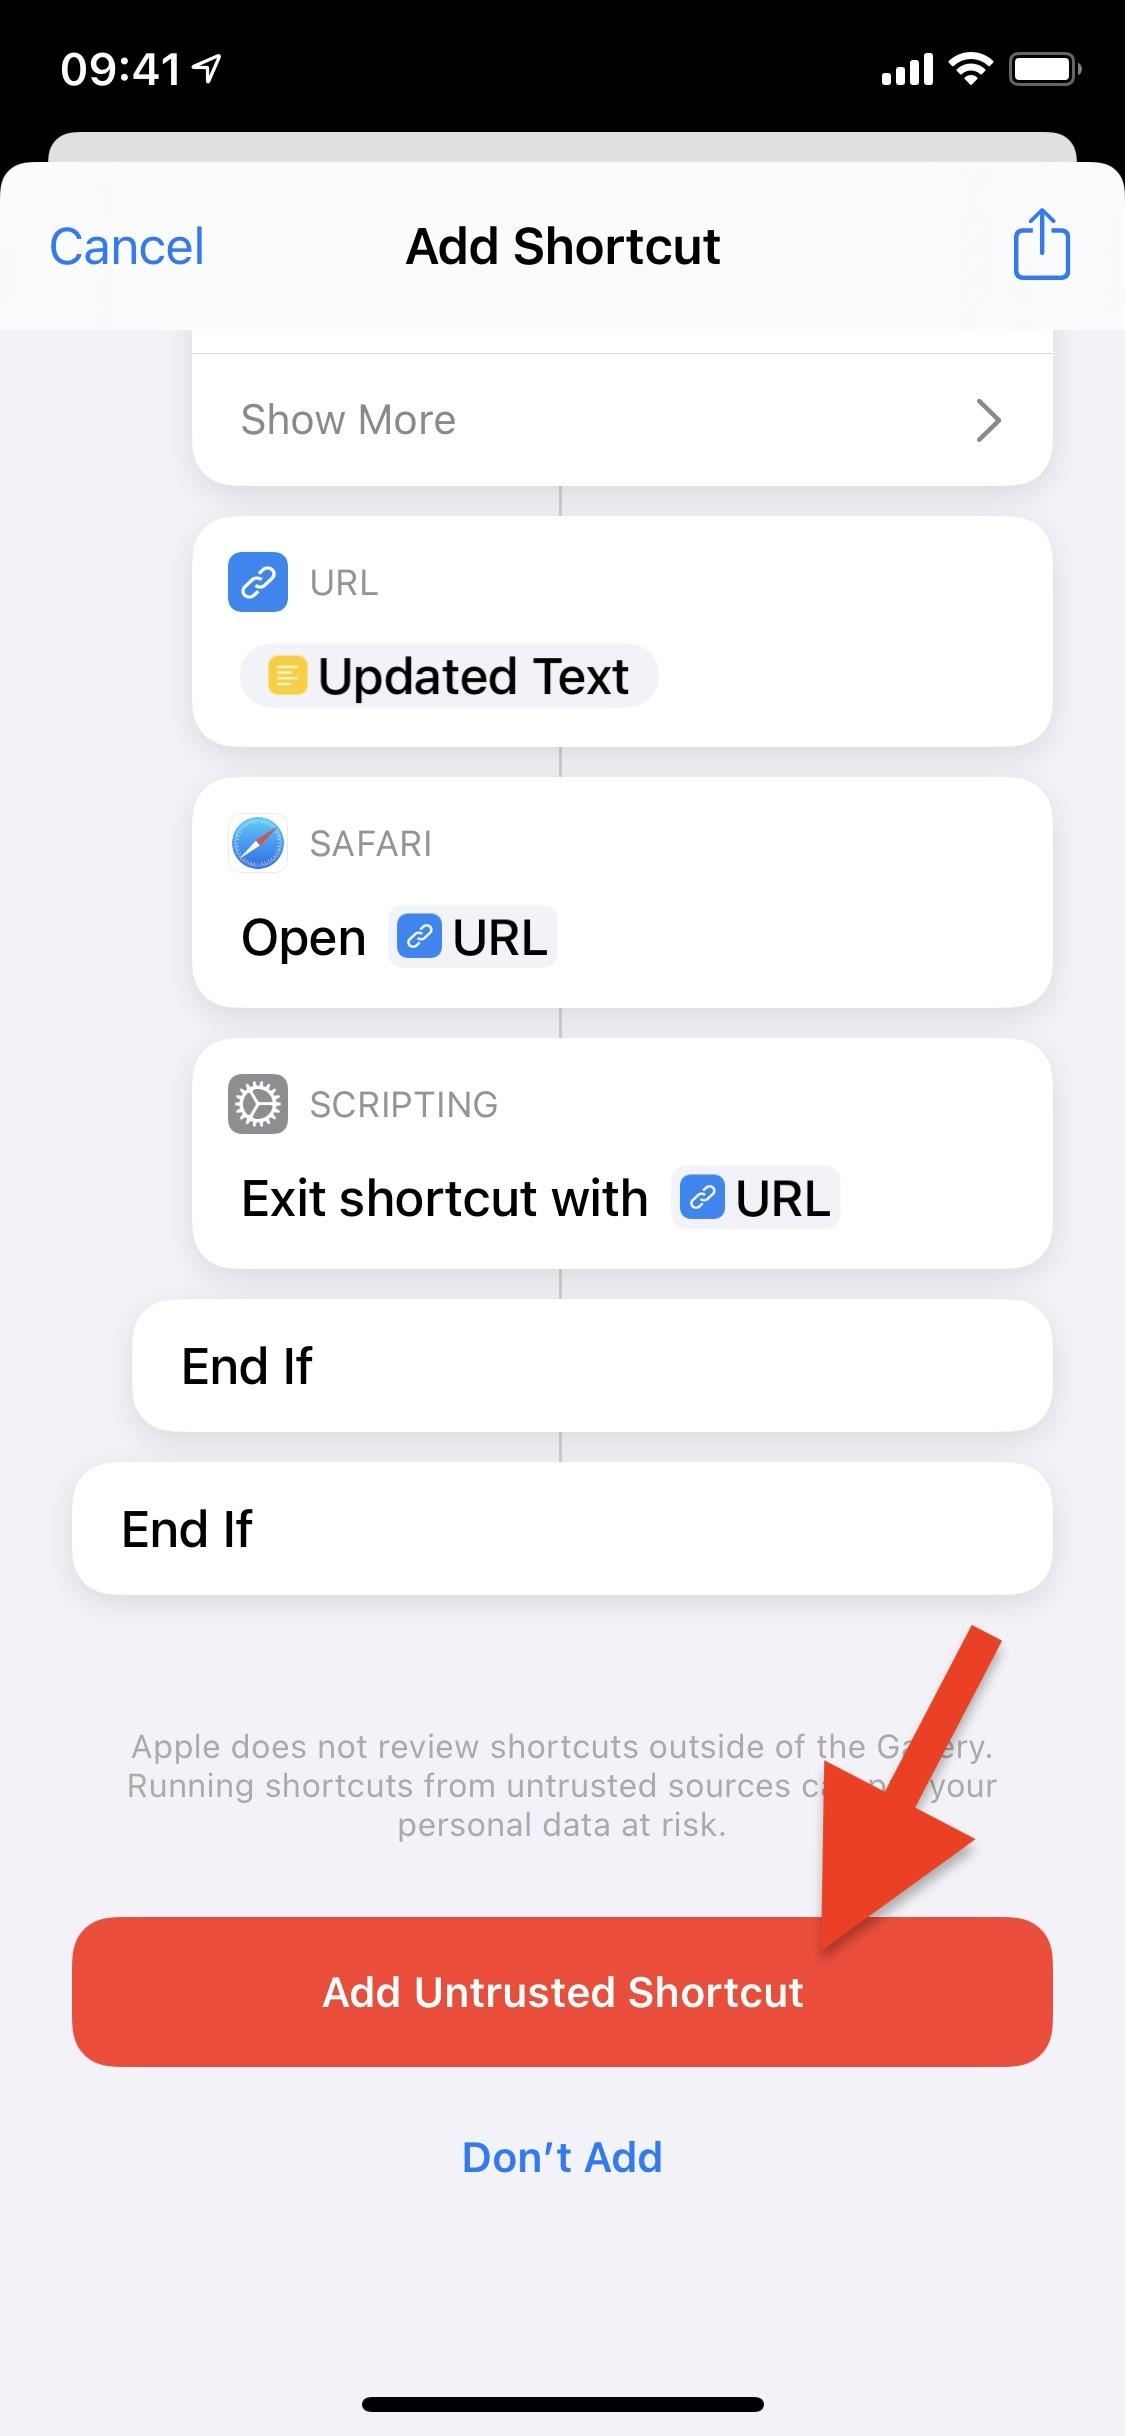
After reviewing the shortcut, tap "Add Untrusted Shortcut" at the bottom to add it.
Step 2: Add Birthdays for Your Contacts
Unless you formally share contacts, you probably just ask for a name and number and put it into your iPhone. That means you probably don't have birthdays included for contacts, so you must do that manually. Yes, it might be tedious work, but you could add all of the crucial birthdates in no time, and it'll be worth it in the long run.
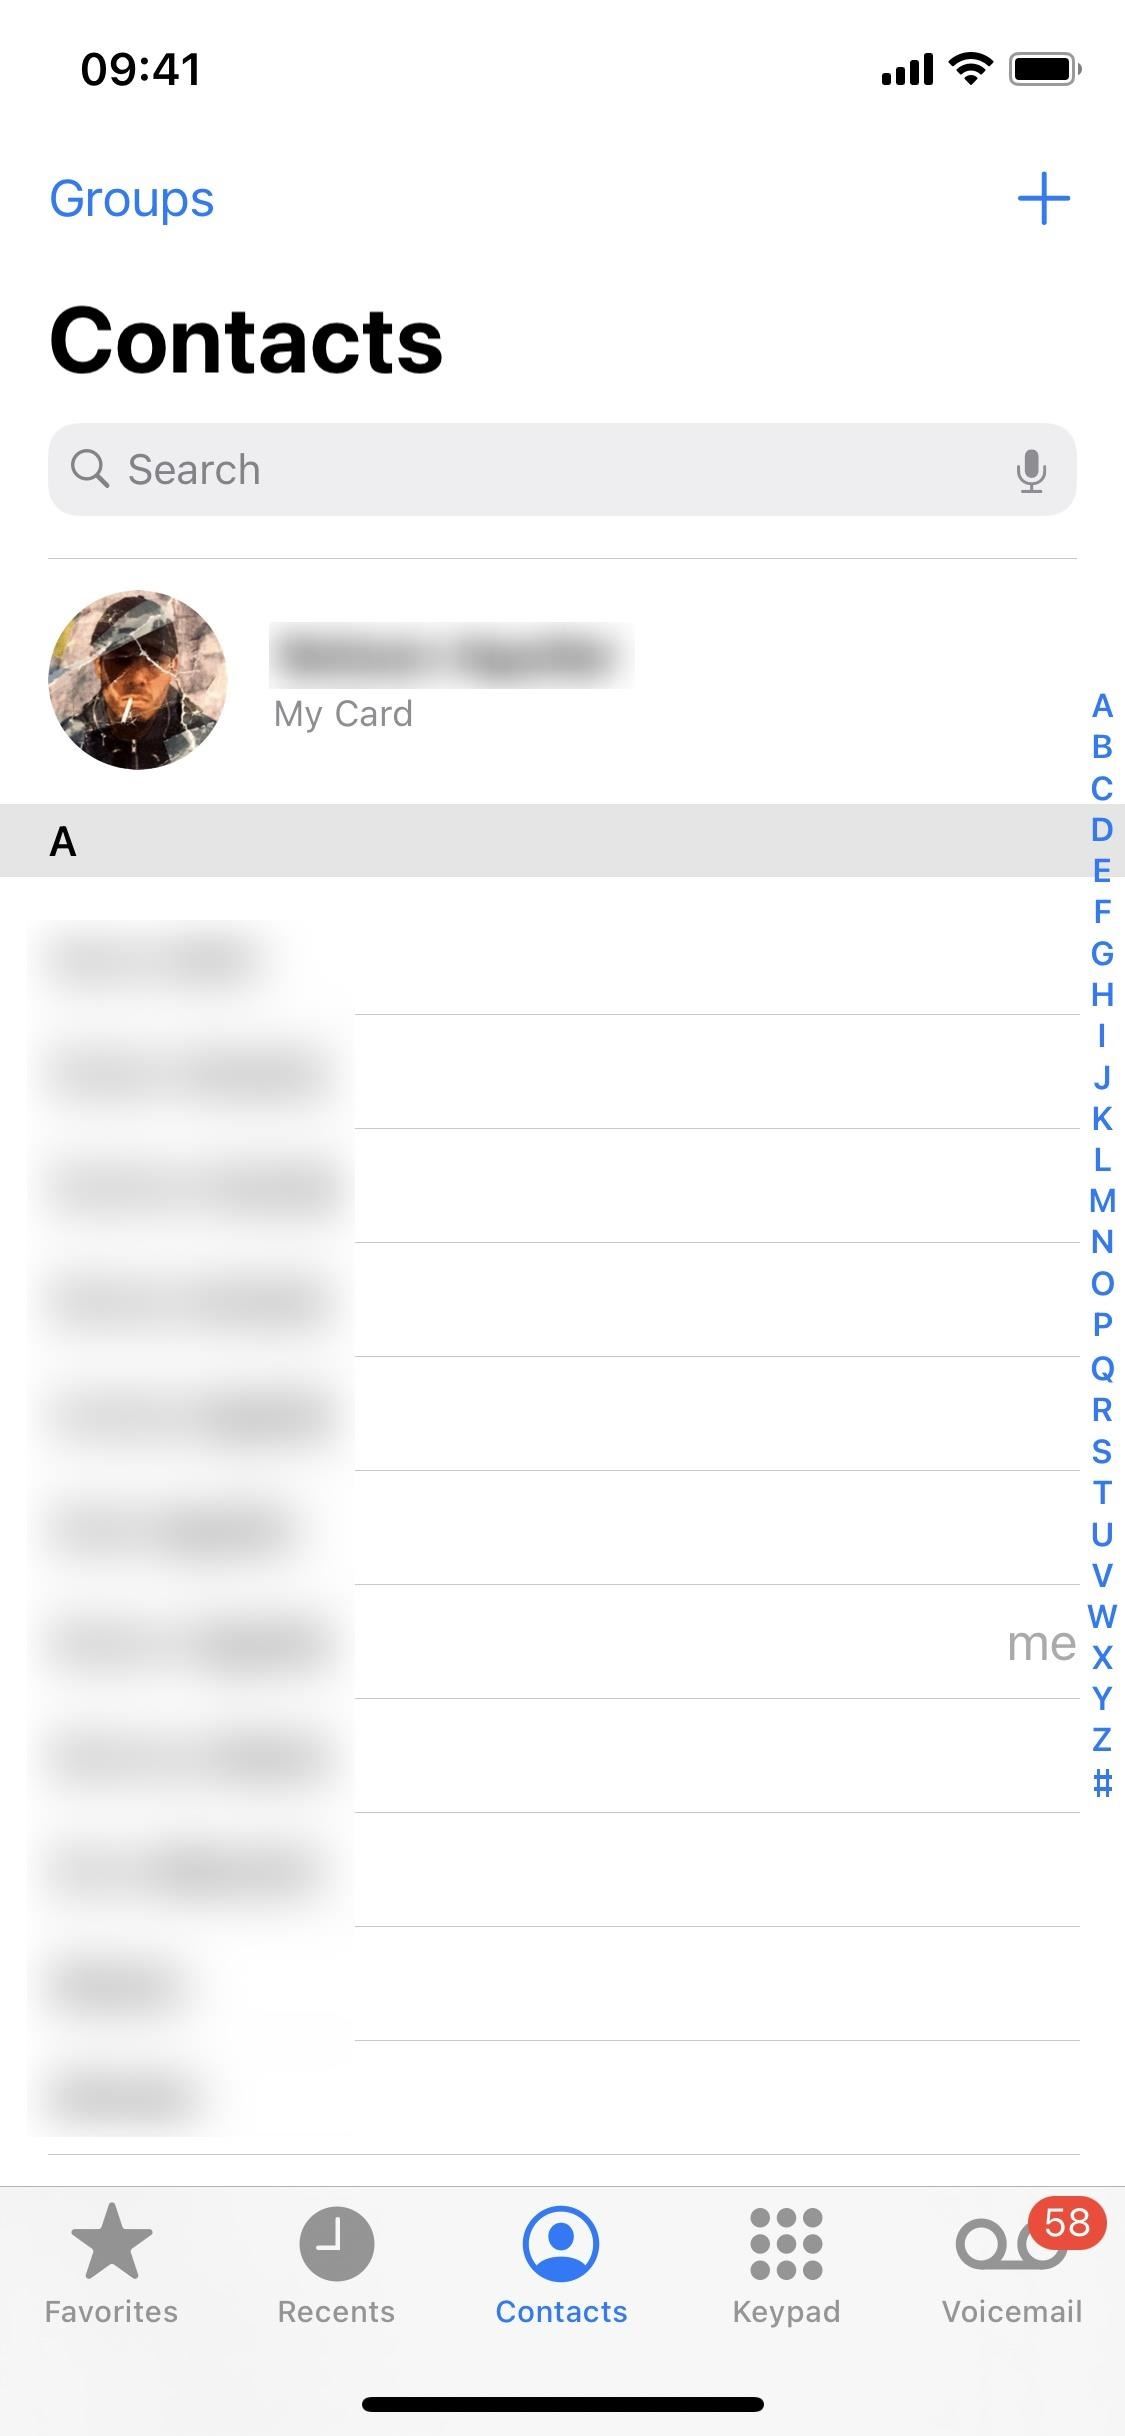
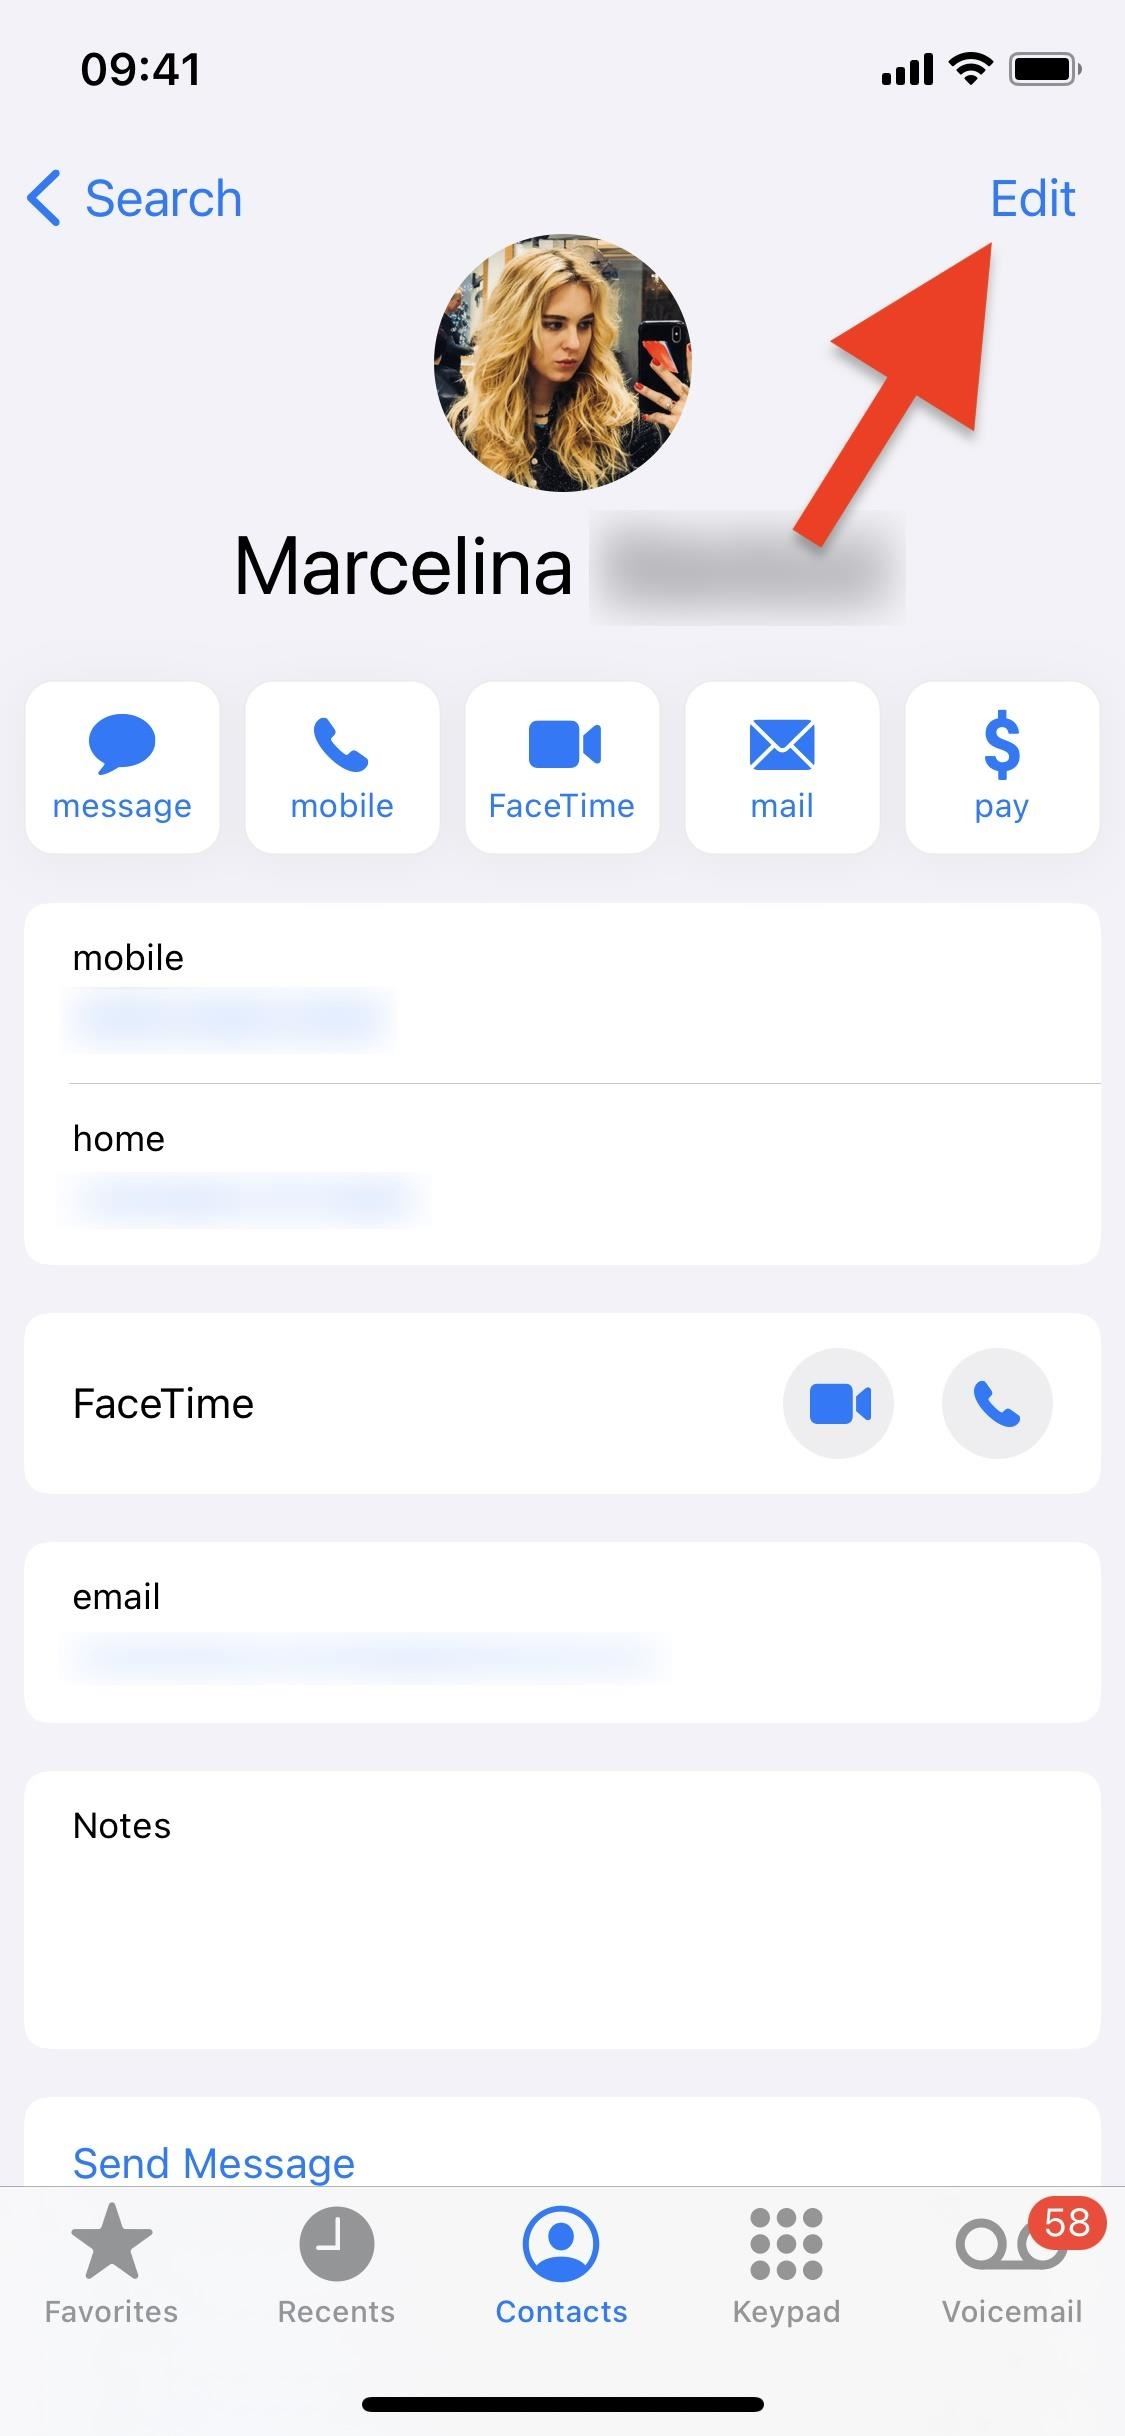
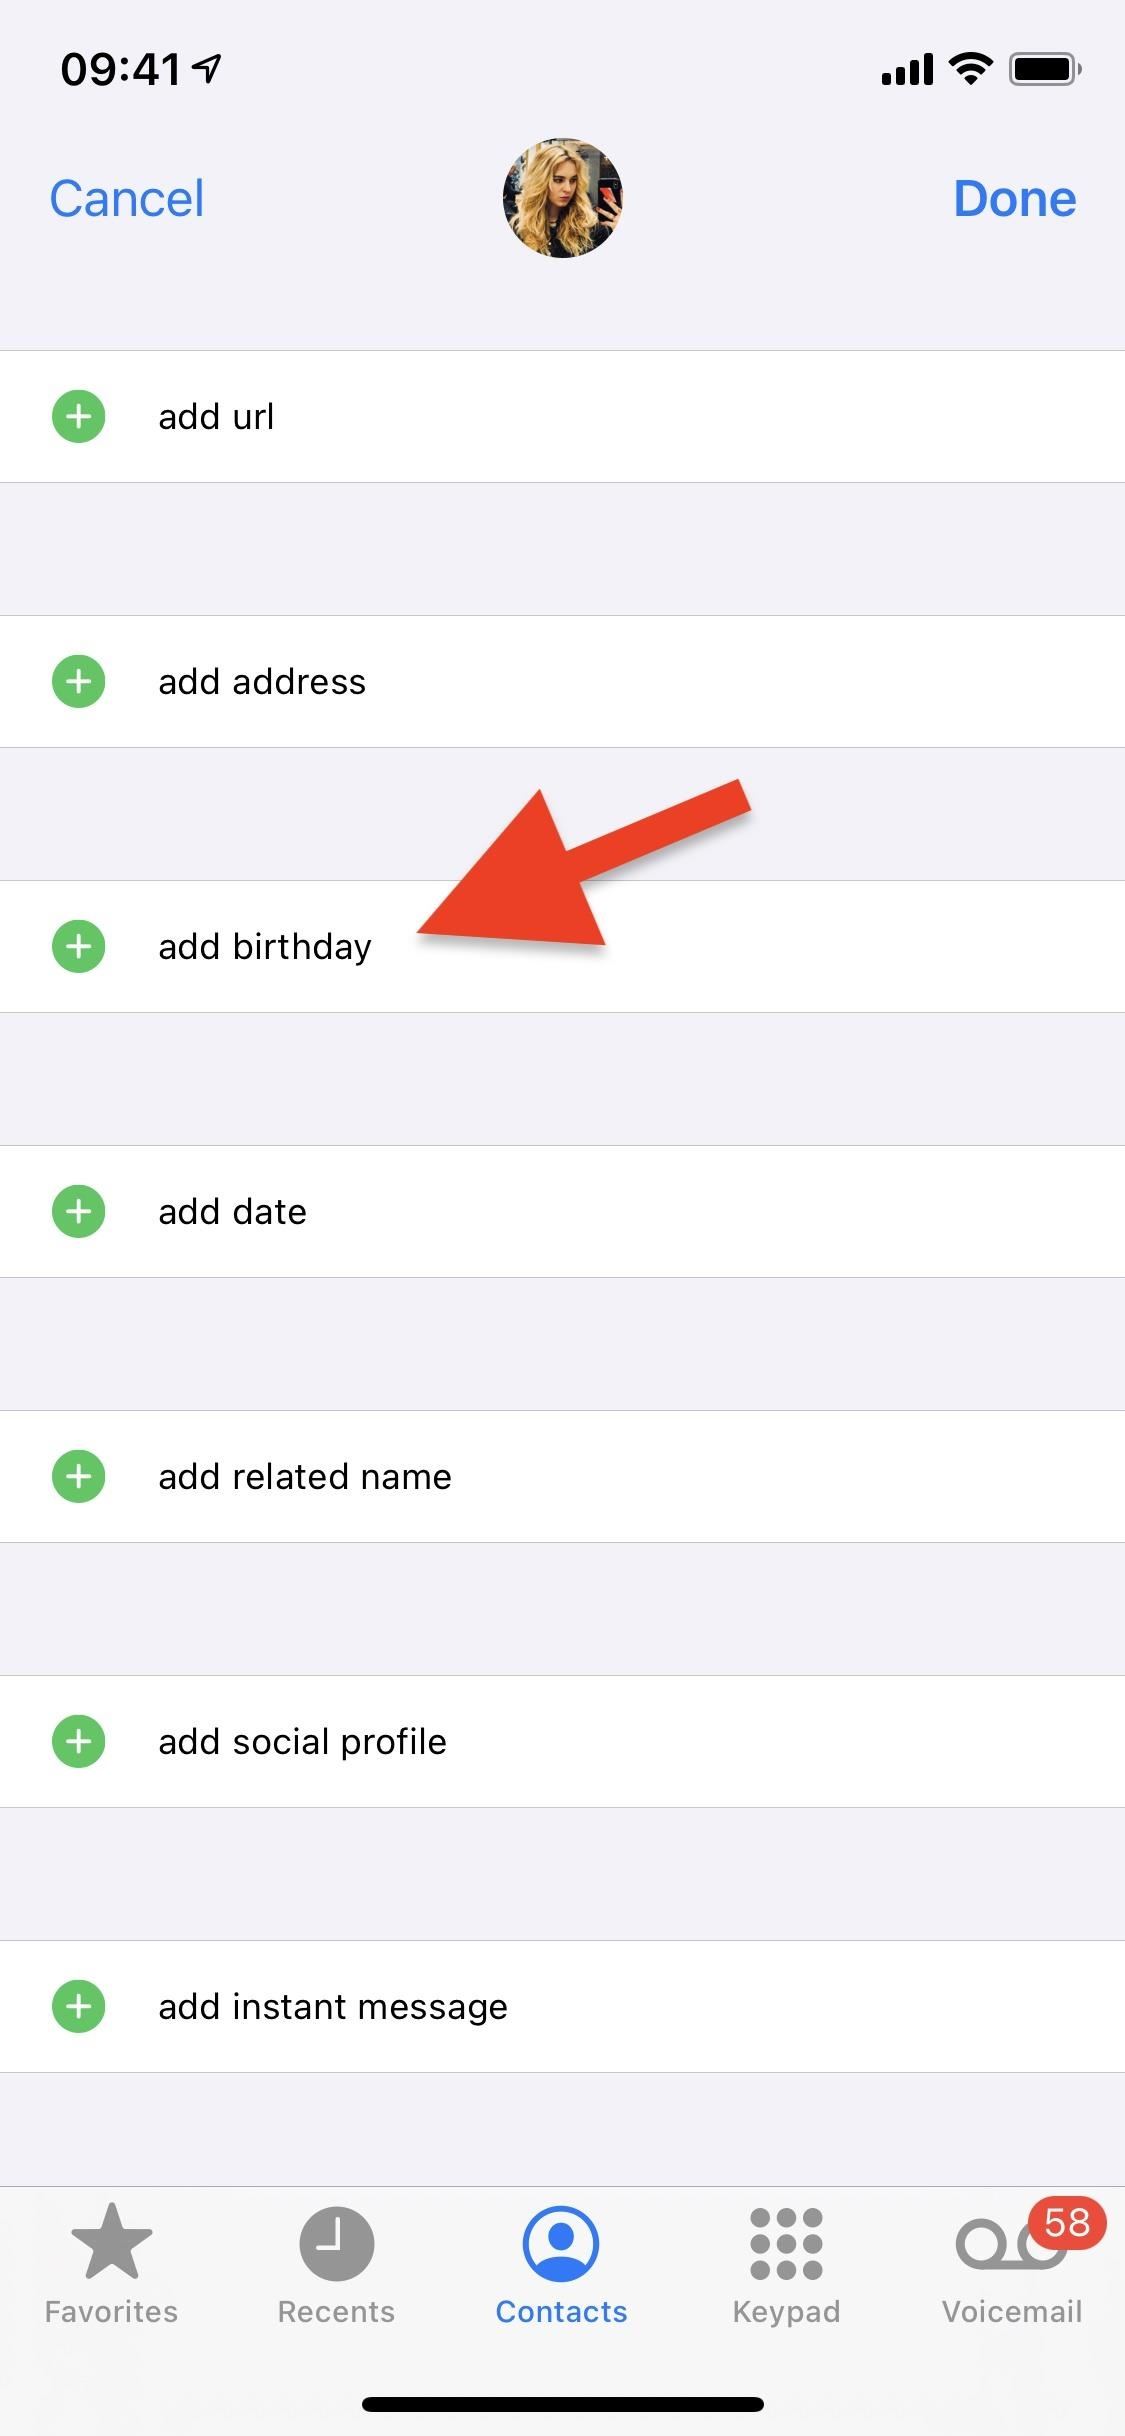
To add a birthday to a contact, open the Contacts app or the "Contacts" tab in the Phone app. Next, find the person you want to add a birthday for, tap on their name, then hit "Edit."
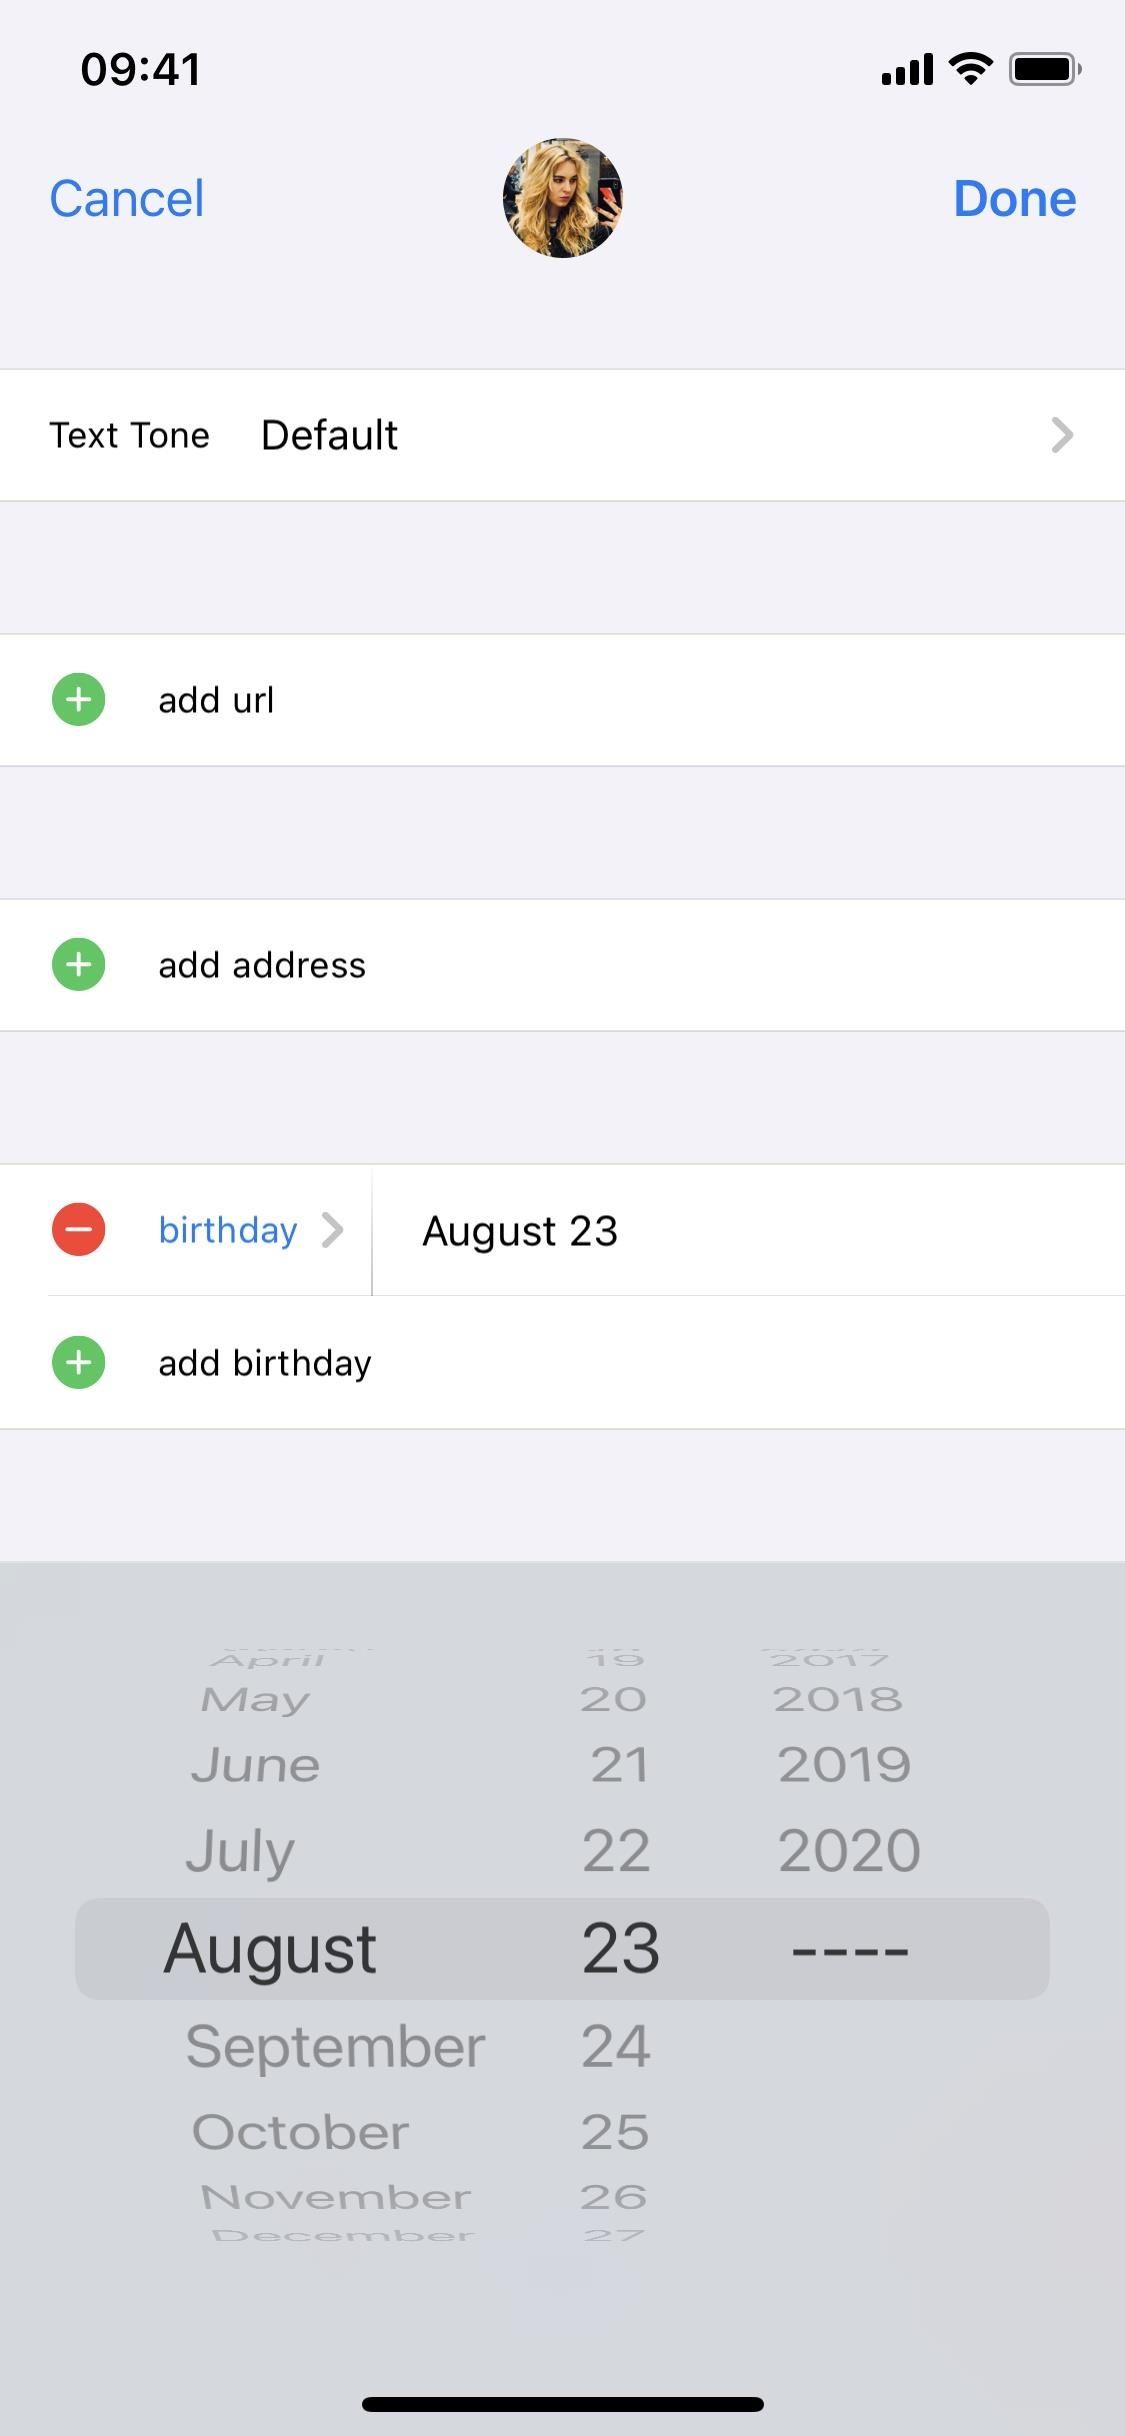
Next, tap on the green button next to "add birthday." Enter the day they were born, then tap on "Done" in the top right when you're finished. Your contact's birthday is now added! You can continue adding more birthdays to other contacts in the same manner.
Step 3: Customize the Birthday Greeting
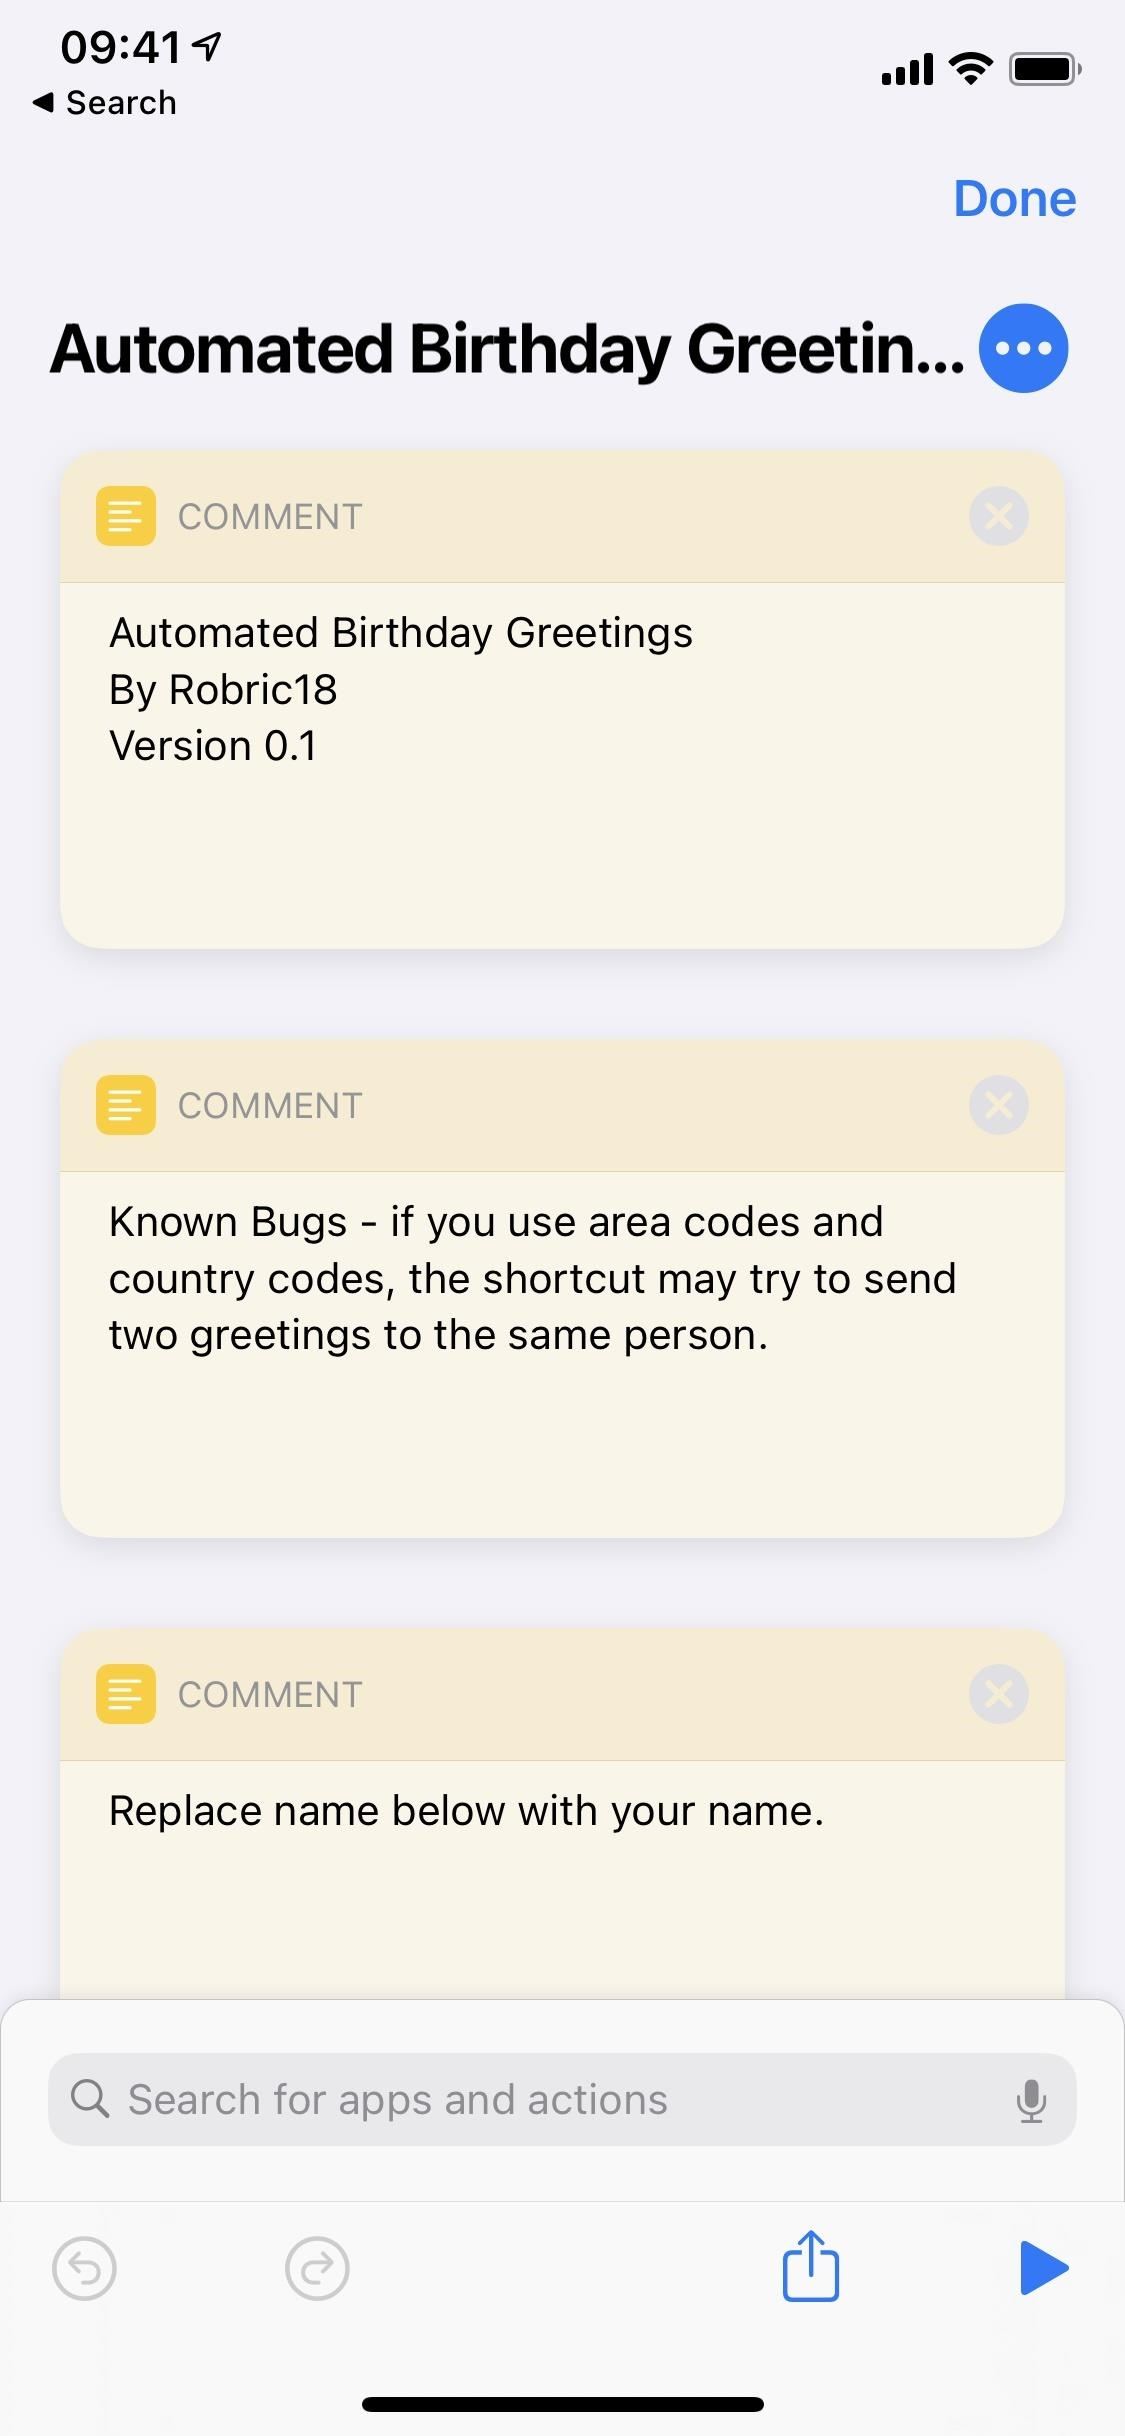
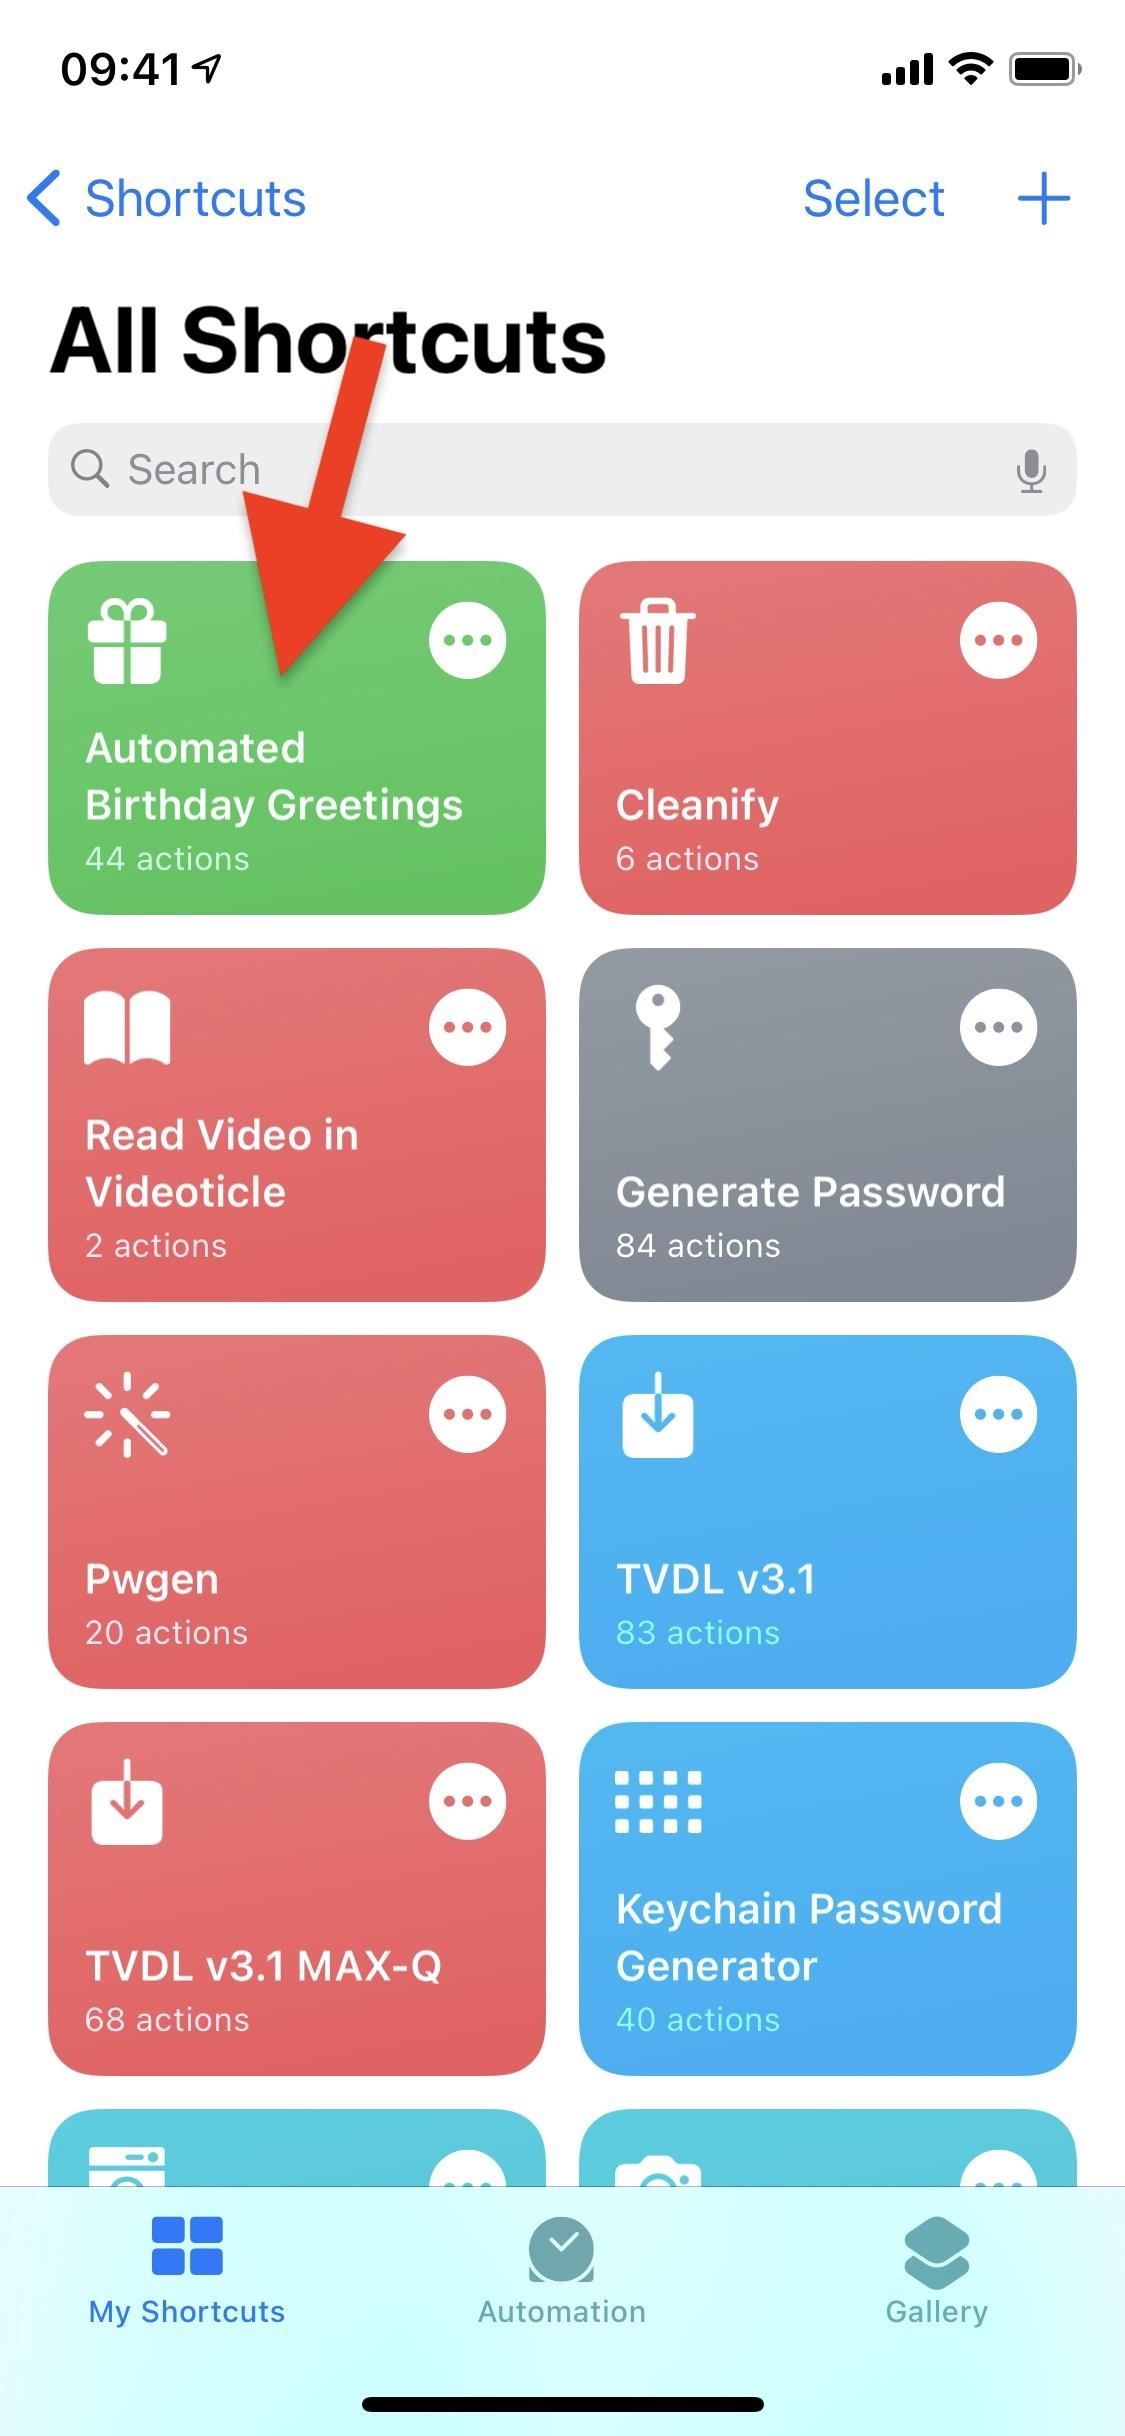
Before you use the shortcut, there are a couple of things you should customize: the greeting and your name. In the "My Shortcuts" tab in the Shortcuts app, find the "Automated Birthday Greetings" shortcut, then tap the ellipsis (•••) icon on it. This will show you its workflow where you can tweak things.

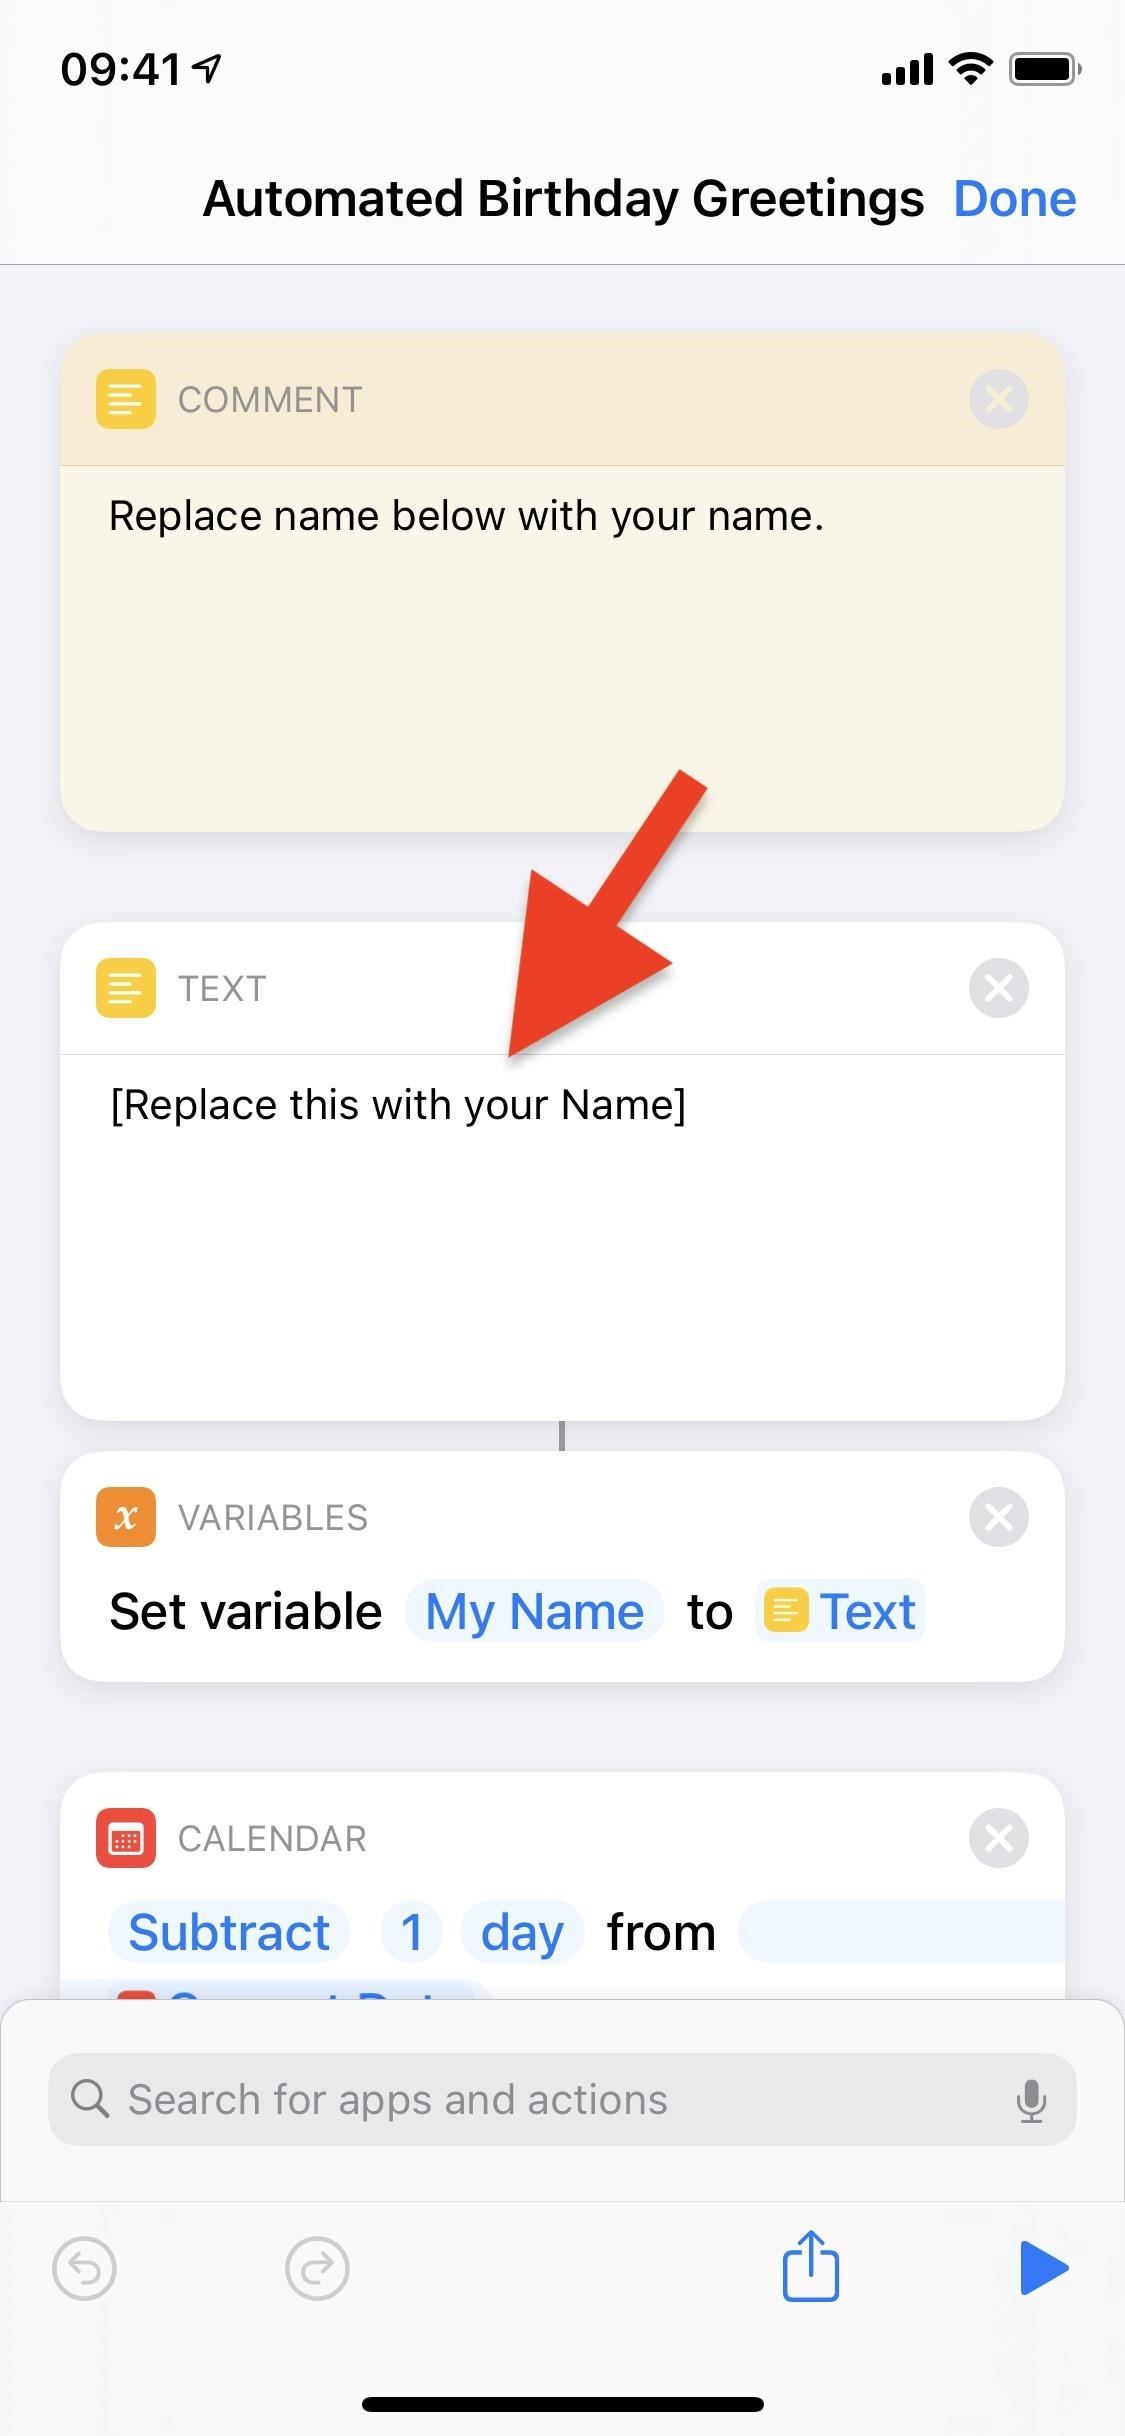
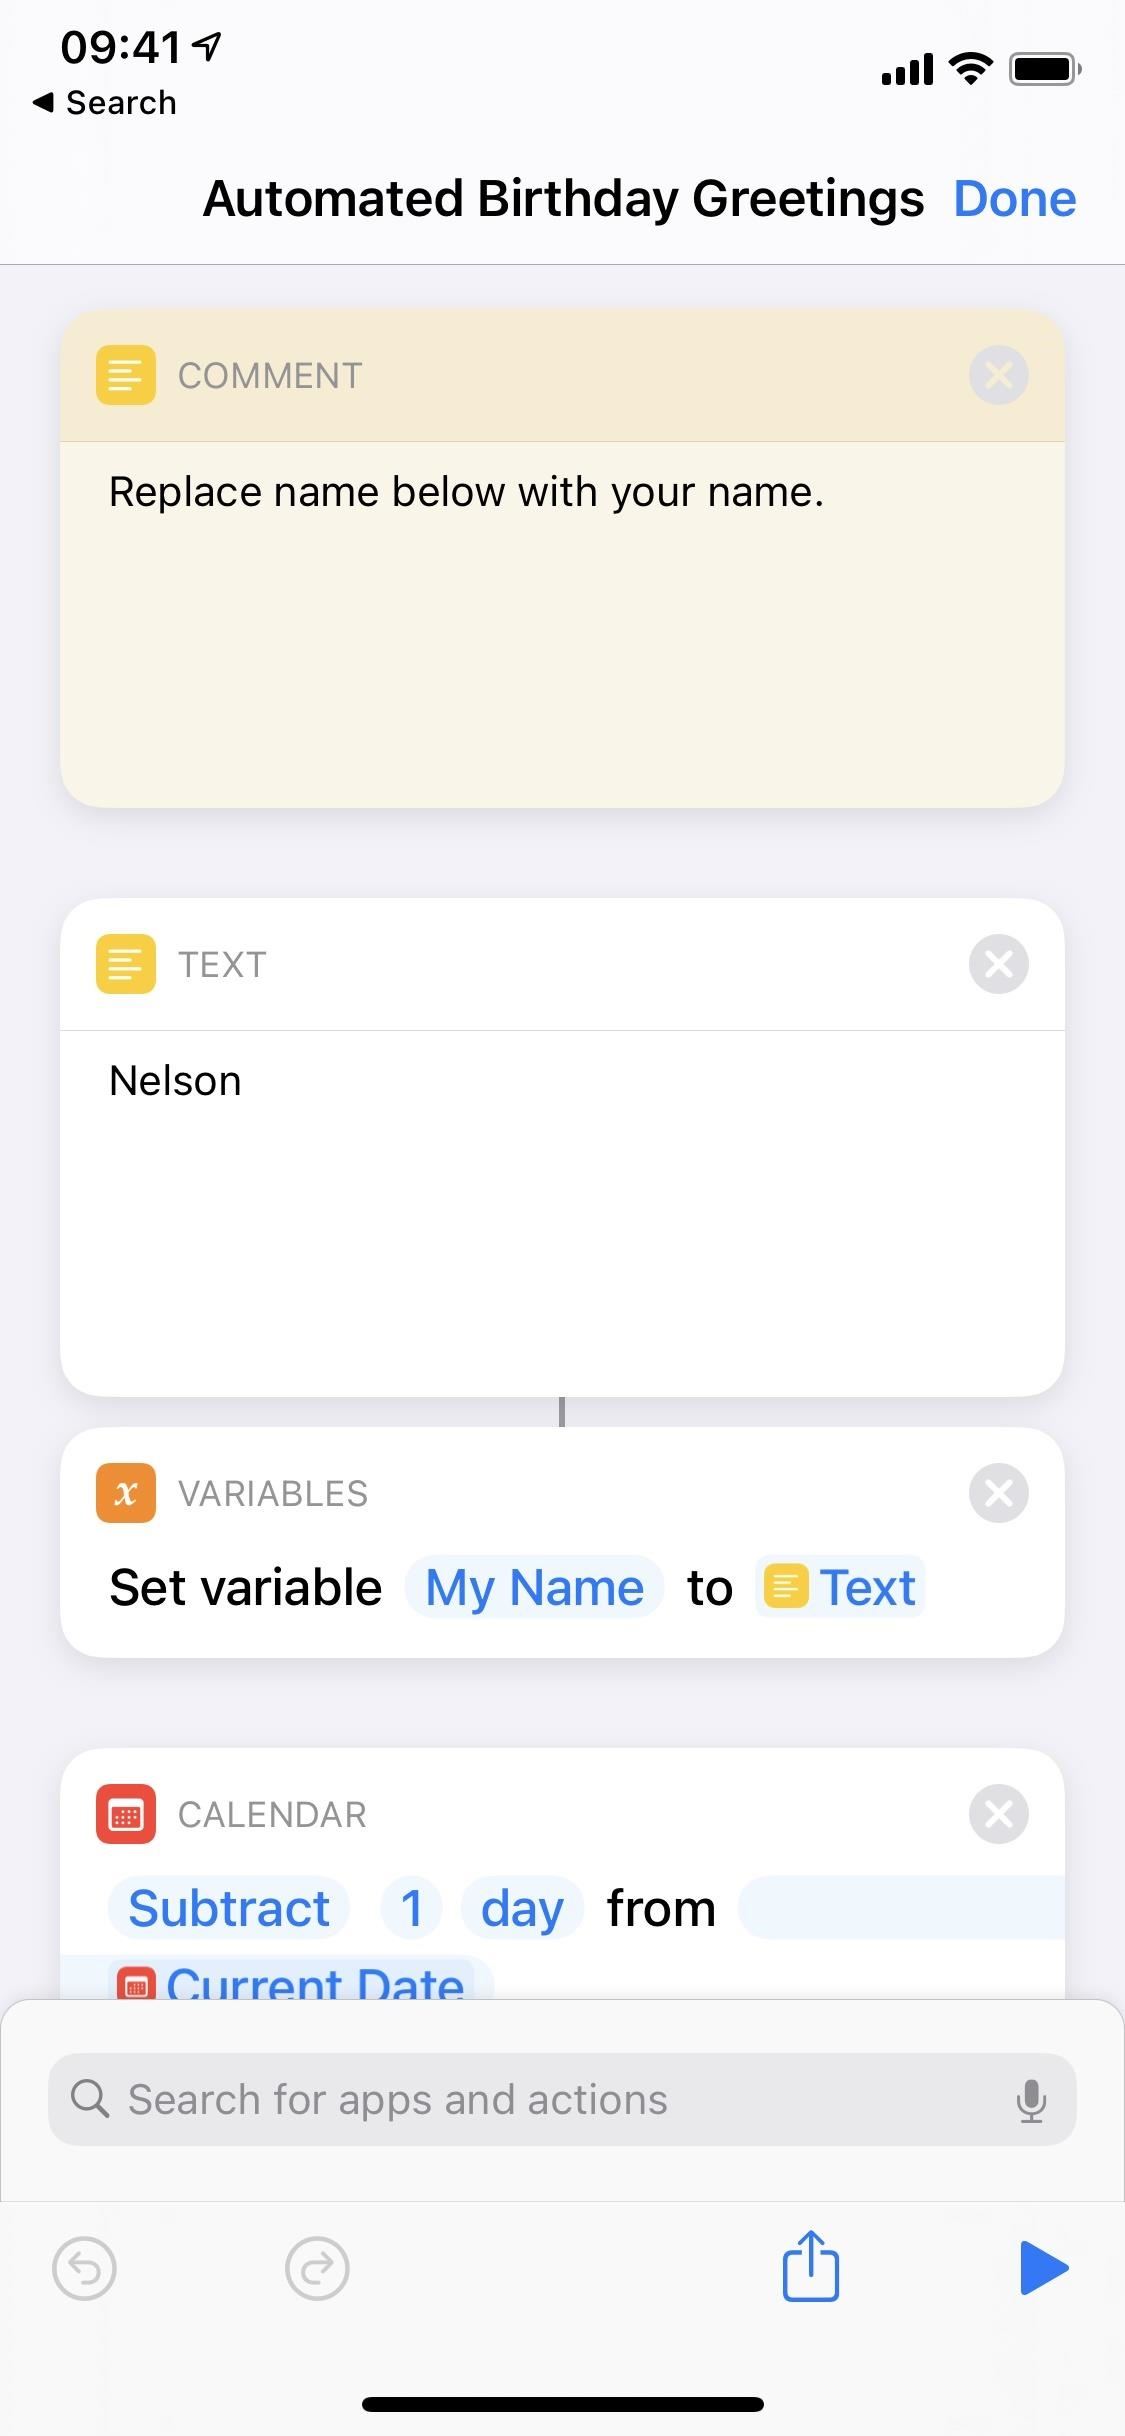
The first thing you should do is add your name to the greeting. If you don't want your name in it, you can skip this part. In the first "Text" action box, below the "Comment" box that says "Replace name below with your name," replace the text with the name you want to use.
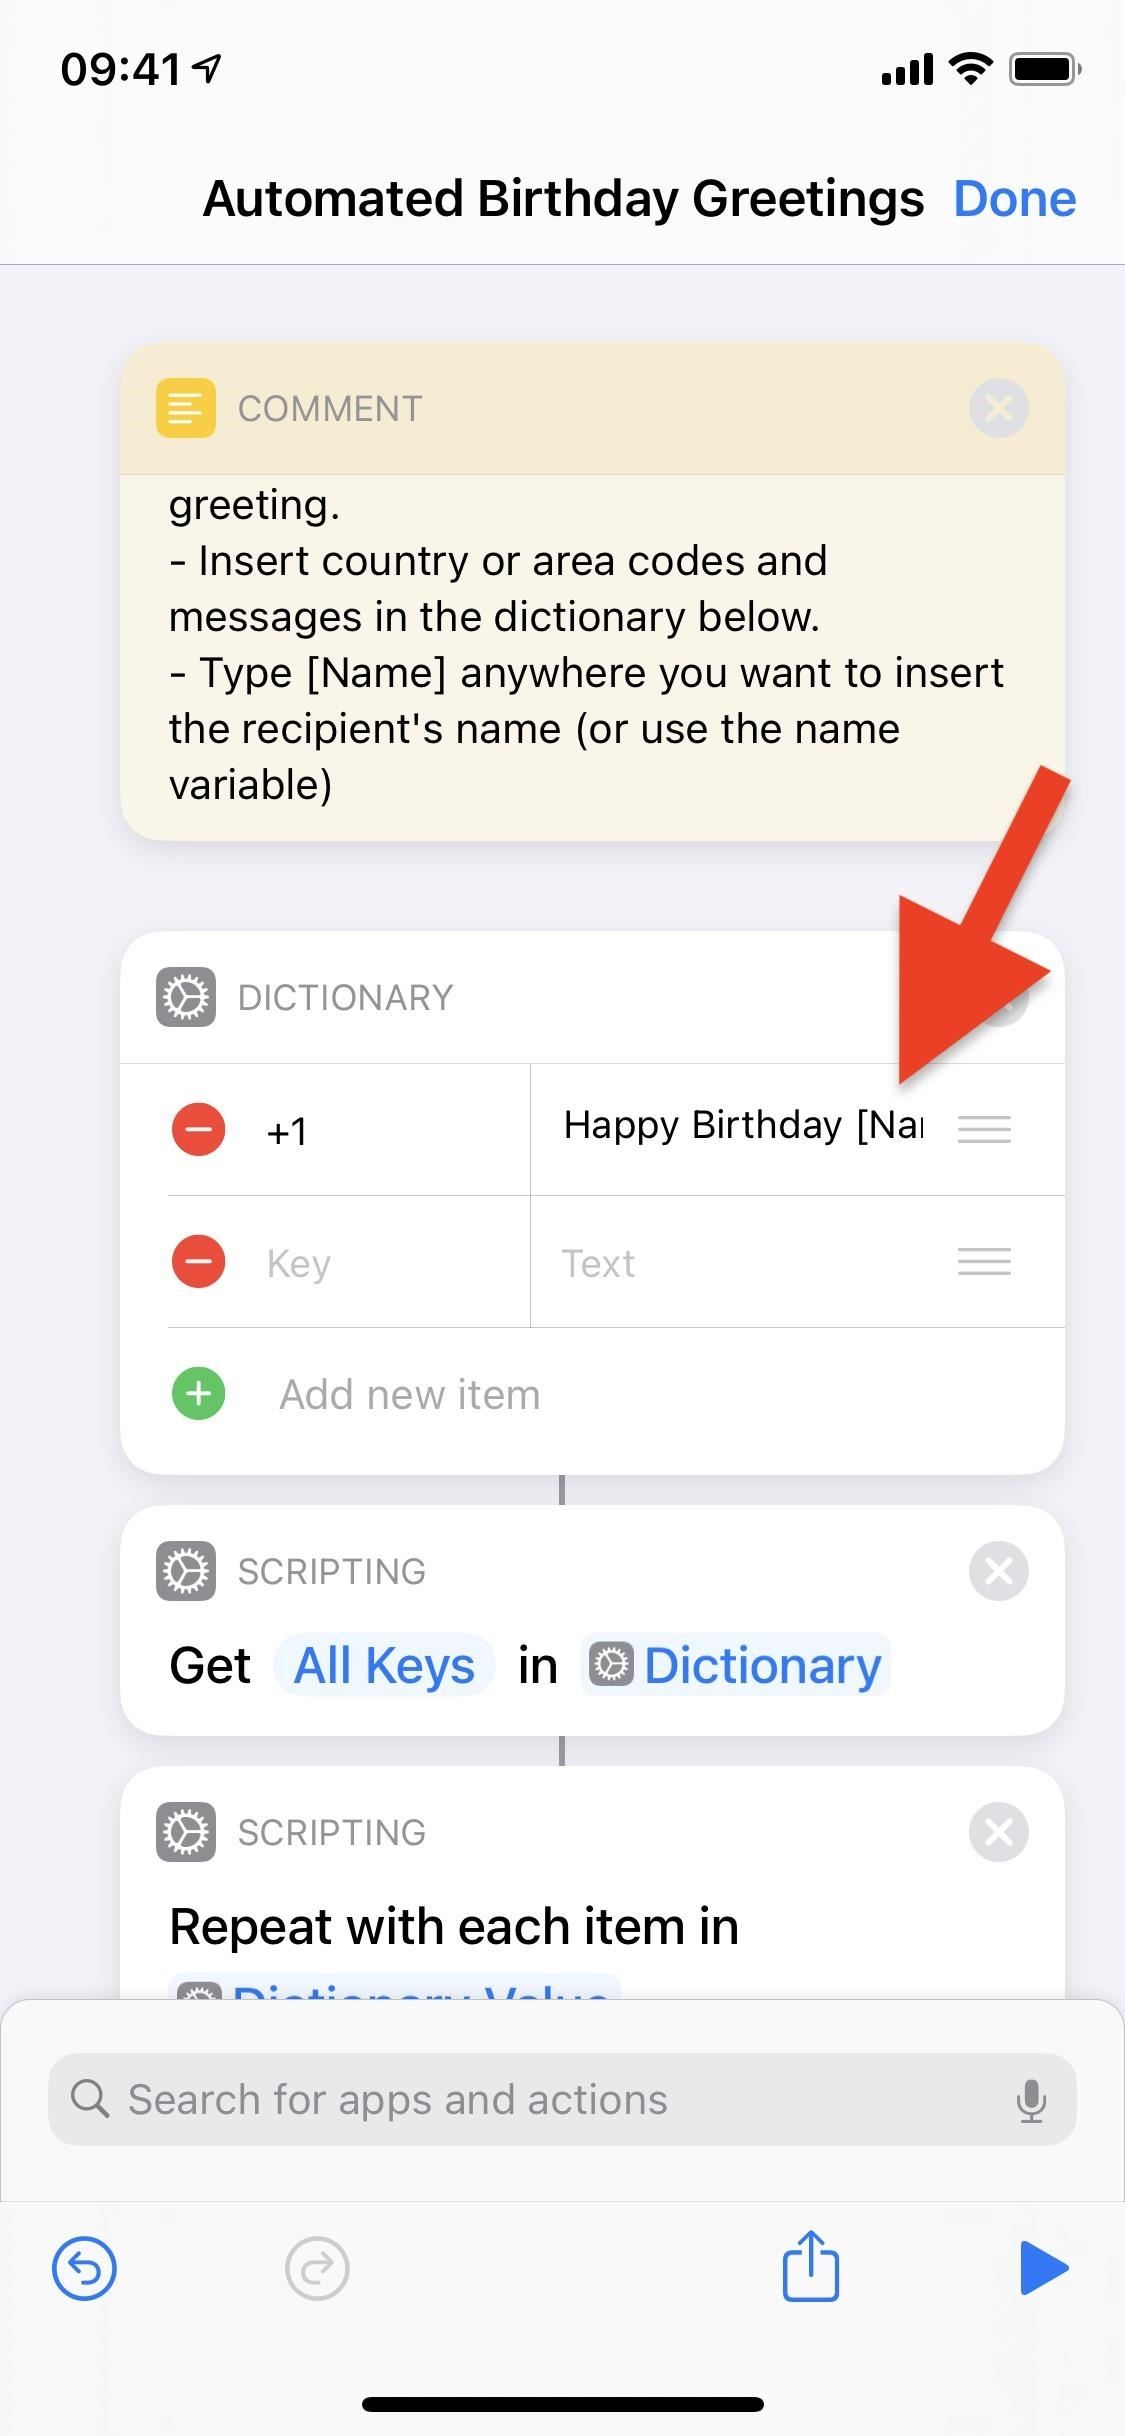
Next up, the birthday greeting itself. Find the "Comment" action box that says "GREETINGS GO HERE" in it. That box explains the process a little, but it's pretty simple:
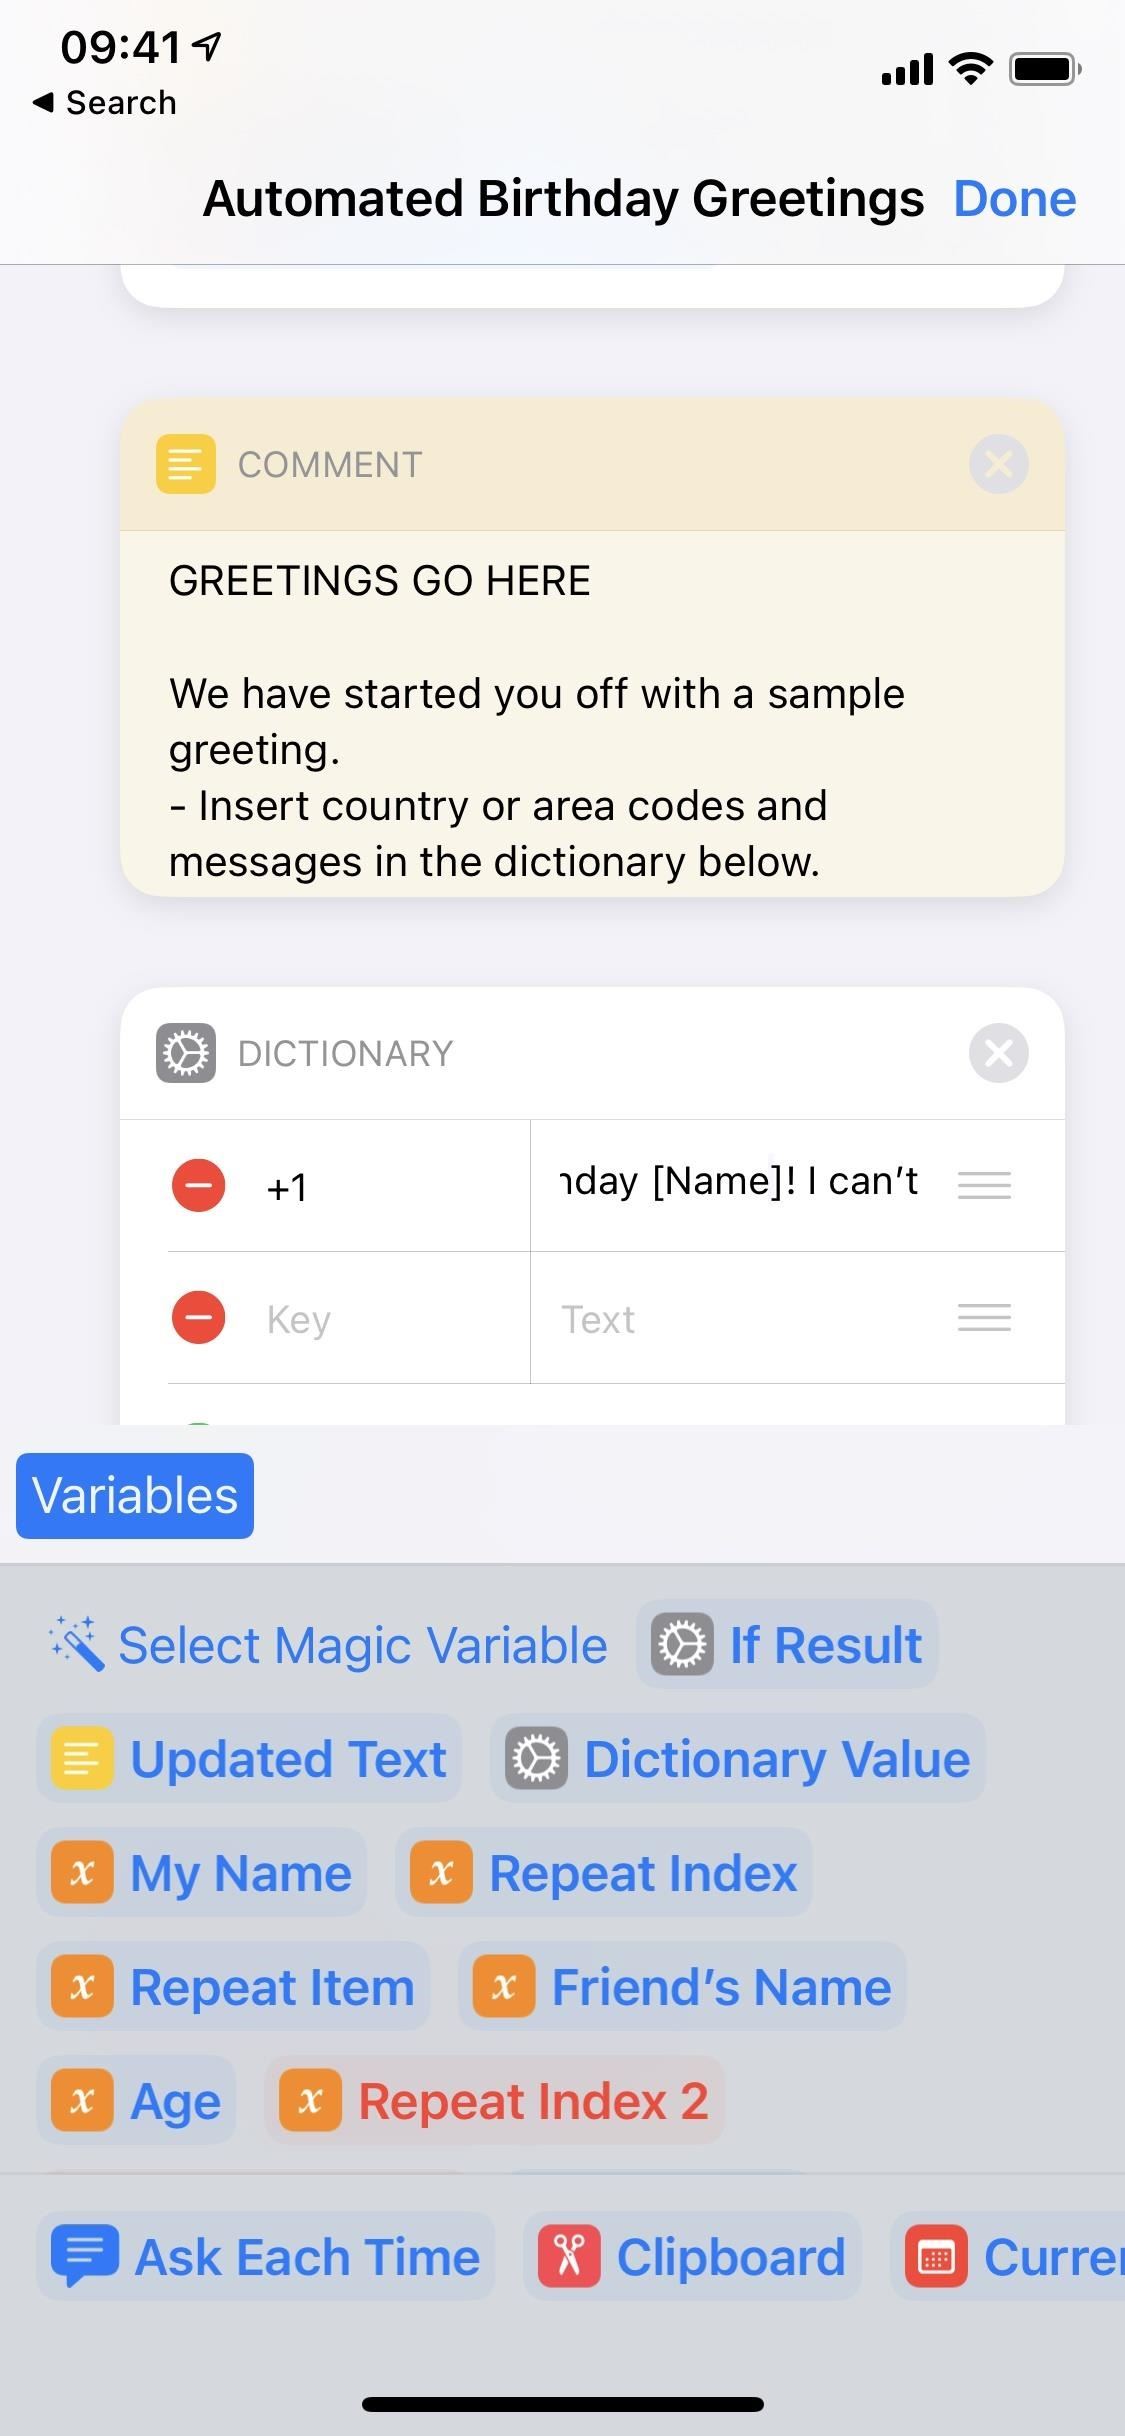
In the "Dictionary" action box below it, next to the +1, there's the default greeting. To change it, tap it, delete the greeting, then build your own. Whenever you want to add your friend's name, tap the "Variable" button above the keyboard, then choose "Friend's Name." Then, choose which name (first, last, middle, or full) you want to use for them, and hit "Done."
Continue typing out your greeting. If you want to say how old the person is in the message, tap "Variable" again, then choose "Age." Where that is will be the age of the person in the greeting. Likewise, to include your name, select "My Name" from "Variables."
When you're done, that's pretty much all you need to customize in this shortcut, so tap "Done" in the top right to save your edits.
Step 4: Run the Shortcut Manually
You can run the shortcut directly from the Shortcuts app if you want to check for any events for the current day. Just tap on "Automated Birthday Greetings" from "My Shortcuts."
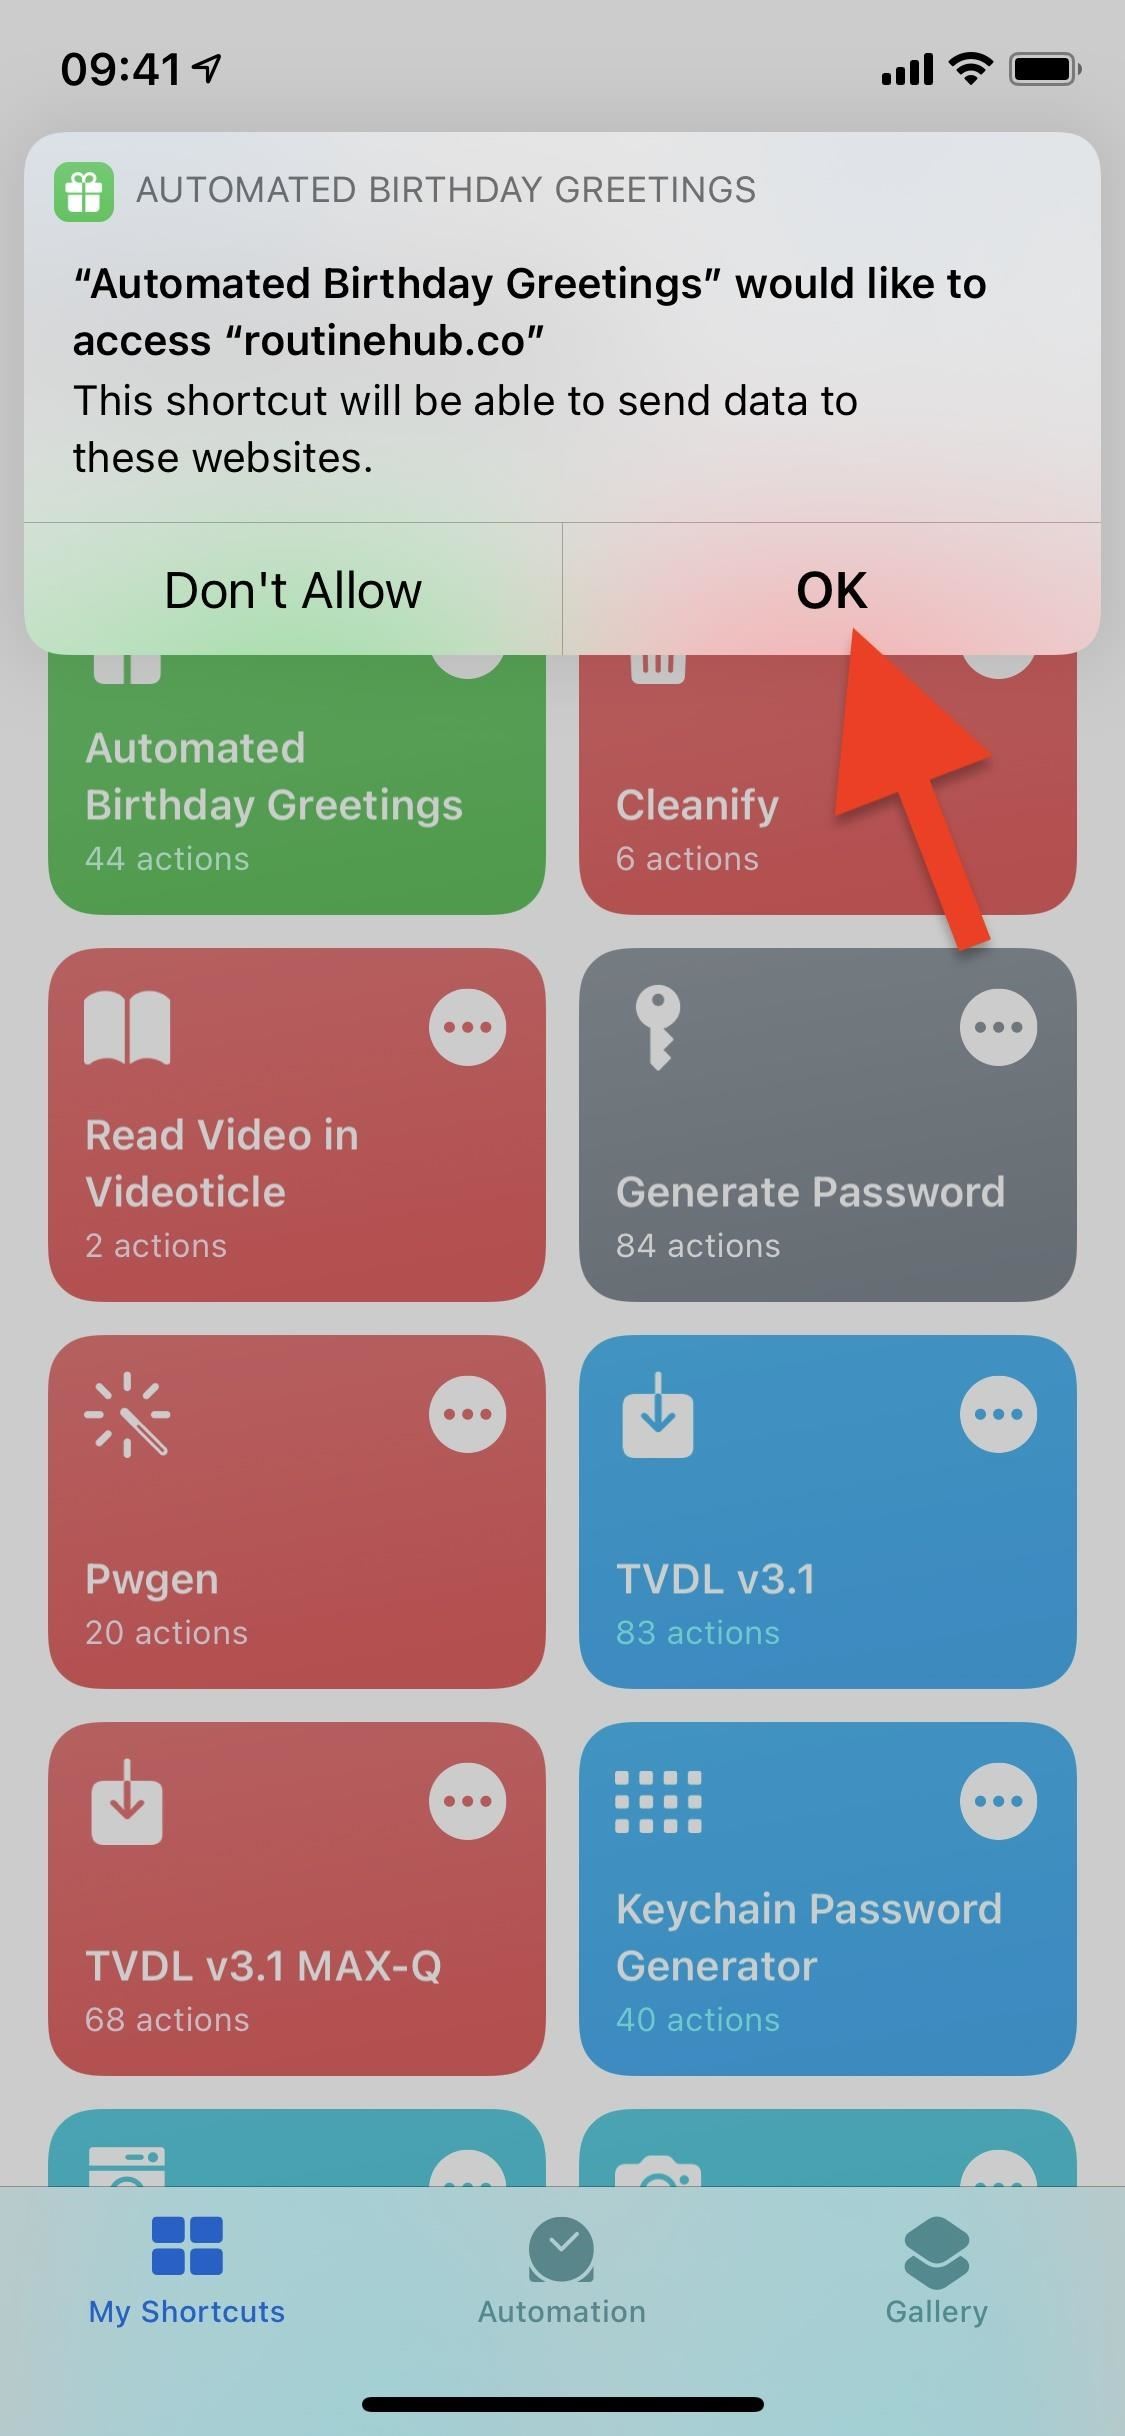
It will ask you for access to your contacts first. Hit "OK," then a list of every contact with a birthday that day will appear in a notification. An error may show if there are none for that day. If you don't want to send a birthday greeting to a contact, simply uncheck their name from the list. Once you're ready to send the text, tap on "Done."

The shortcut will then ask you to let it access RoutineHub's website. You don't have to permit it, but doing so will give you a notification any time the developer has updated the shortcut. That way, you can get the newest version quickly.
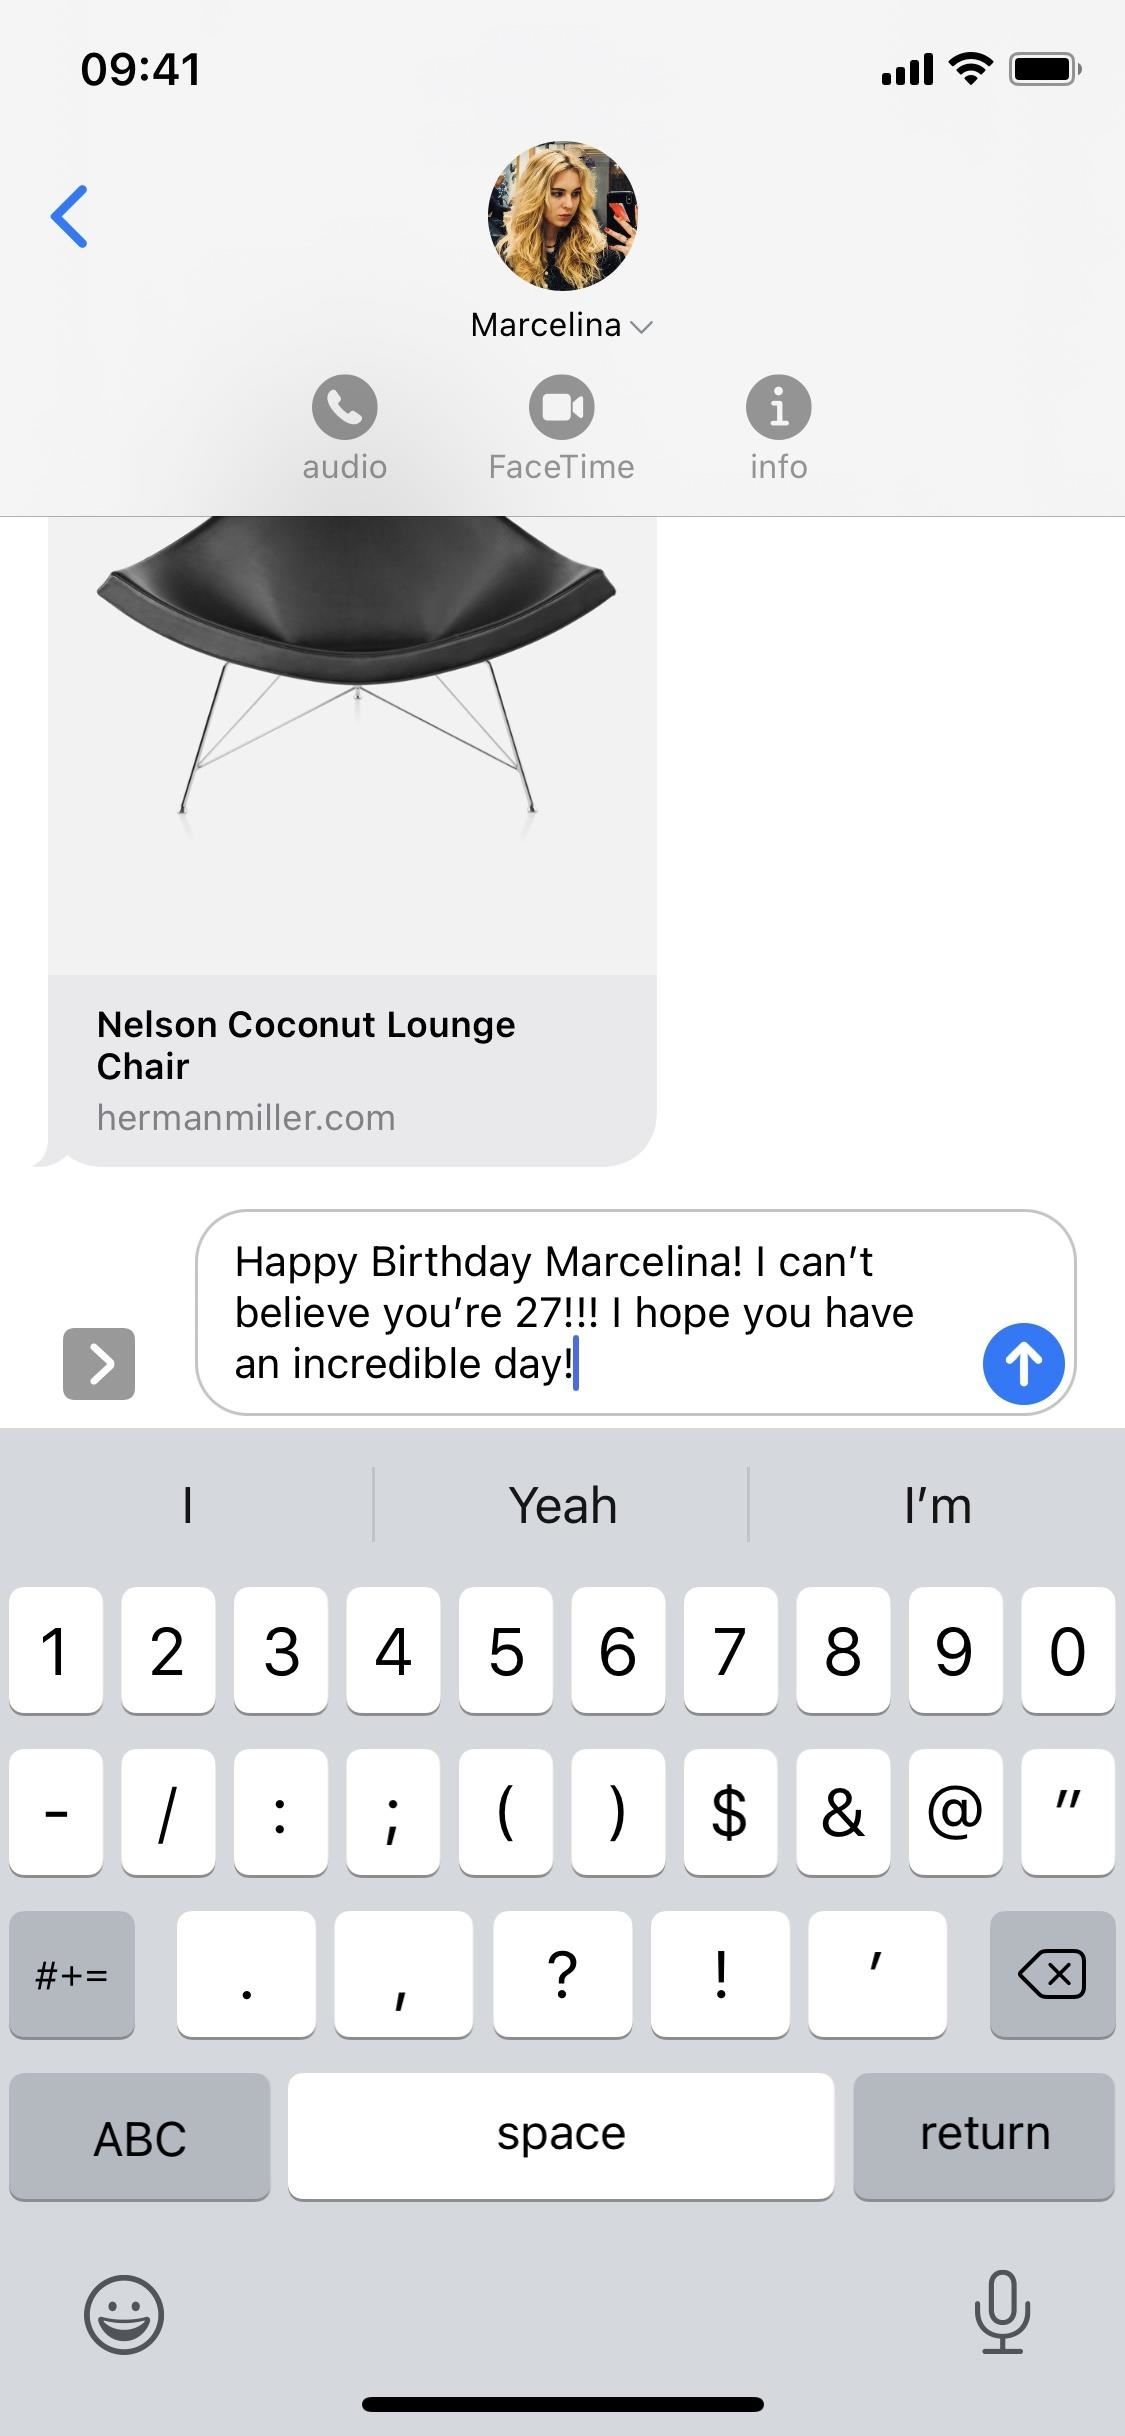
After you hit "OK" or "Don't Allow," you'll be redirected to Messages automatically, and your birthday greeting will be auto-populated into the text field, ready to send to your contact. Hit the send button to send the message. If there are any other contacts to send birthday greetings to, you'll be taken back to Shortcuts, and then back to Messages, to send the next greeting.
Step 5: Automate the Whole Process
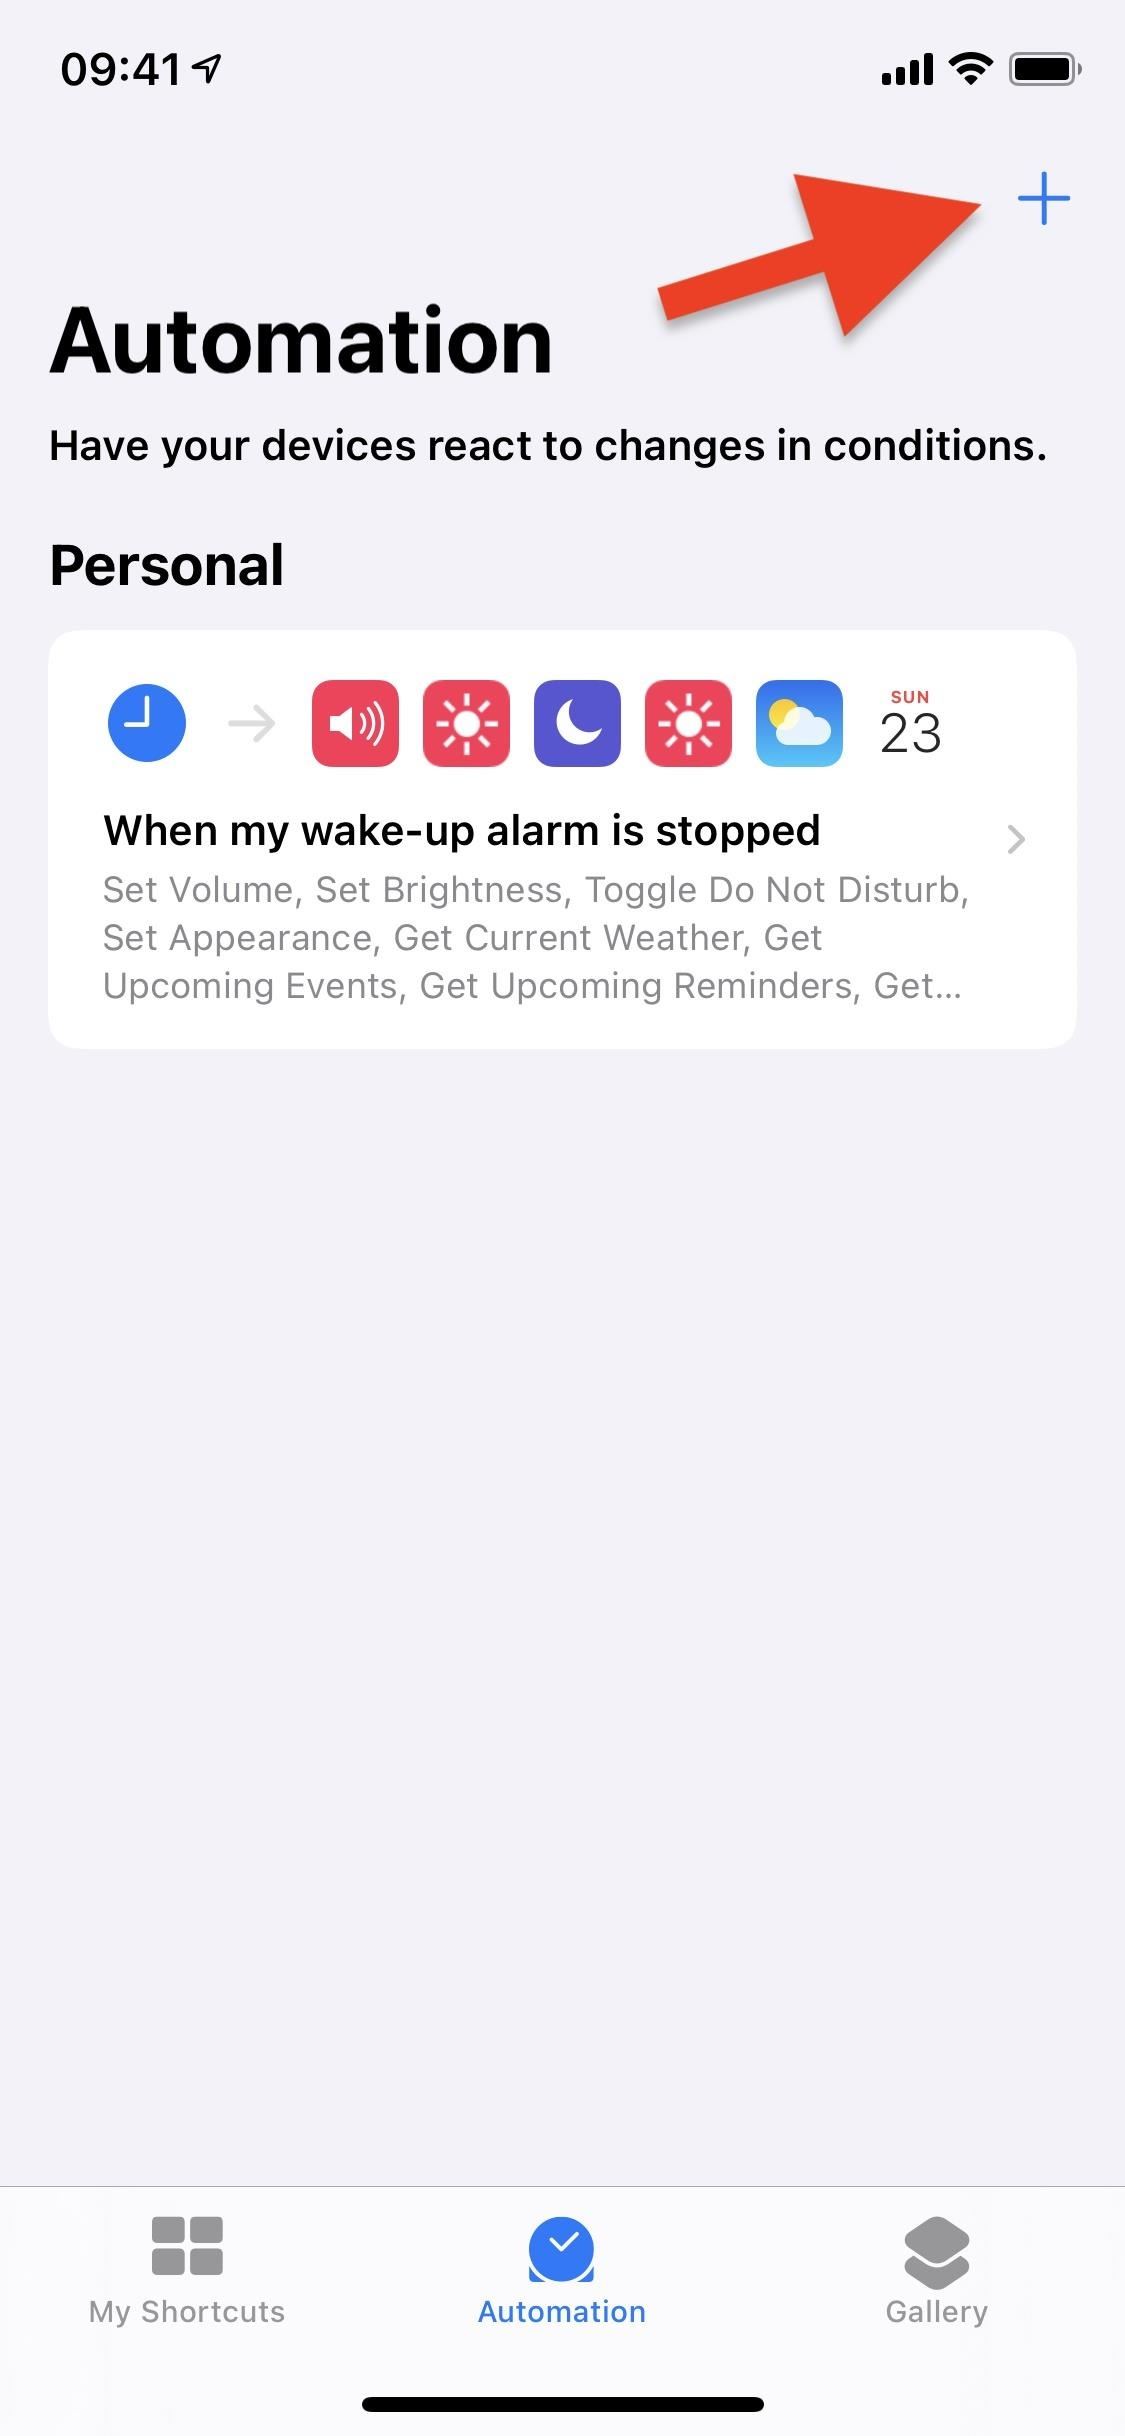
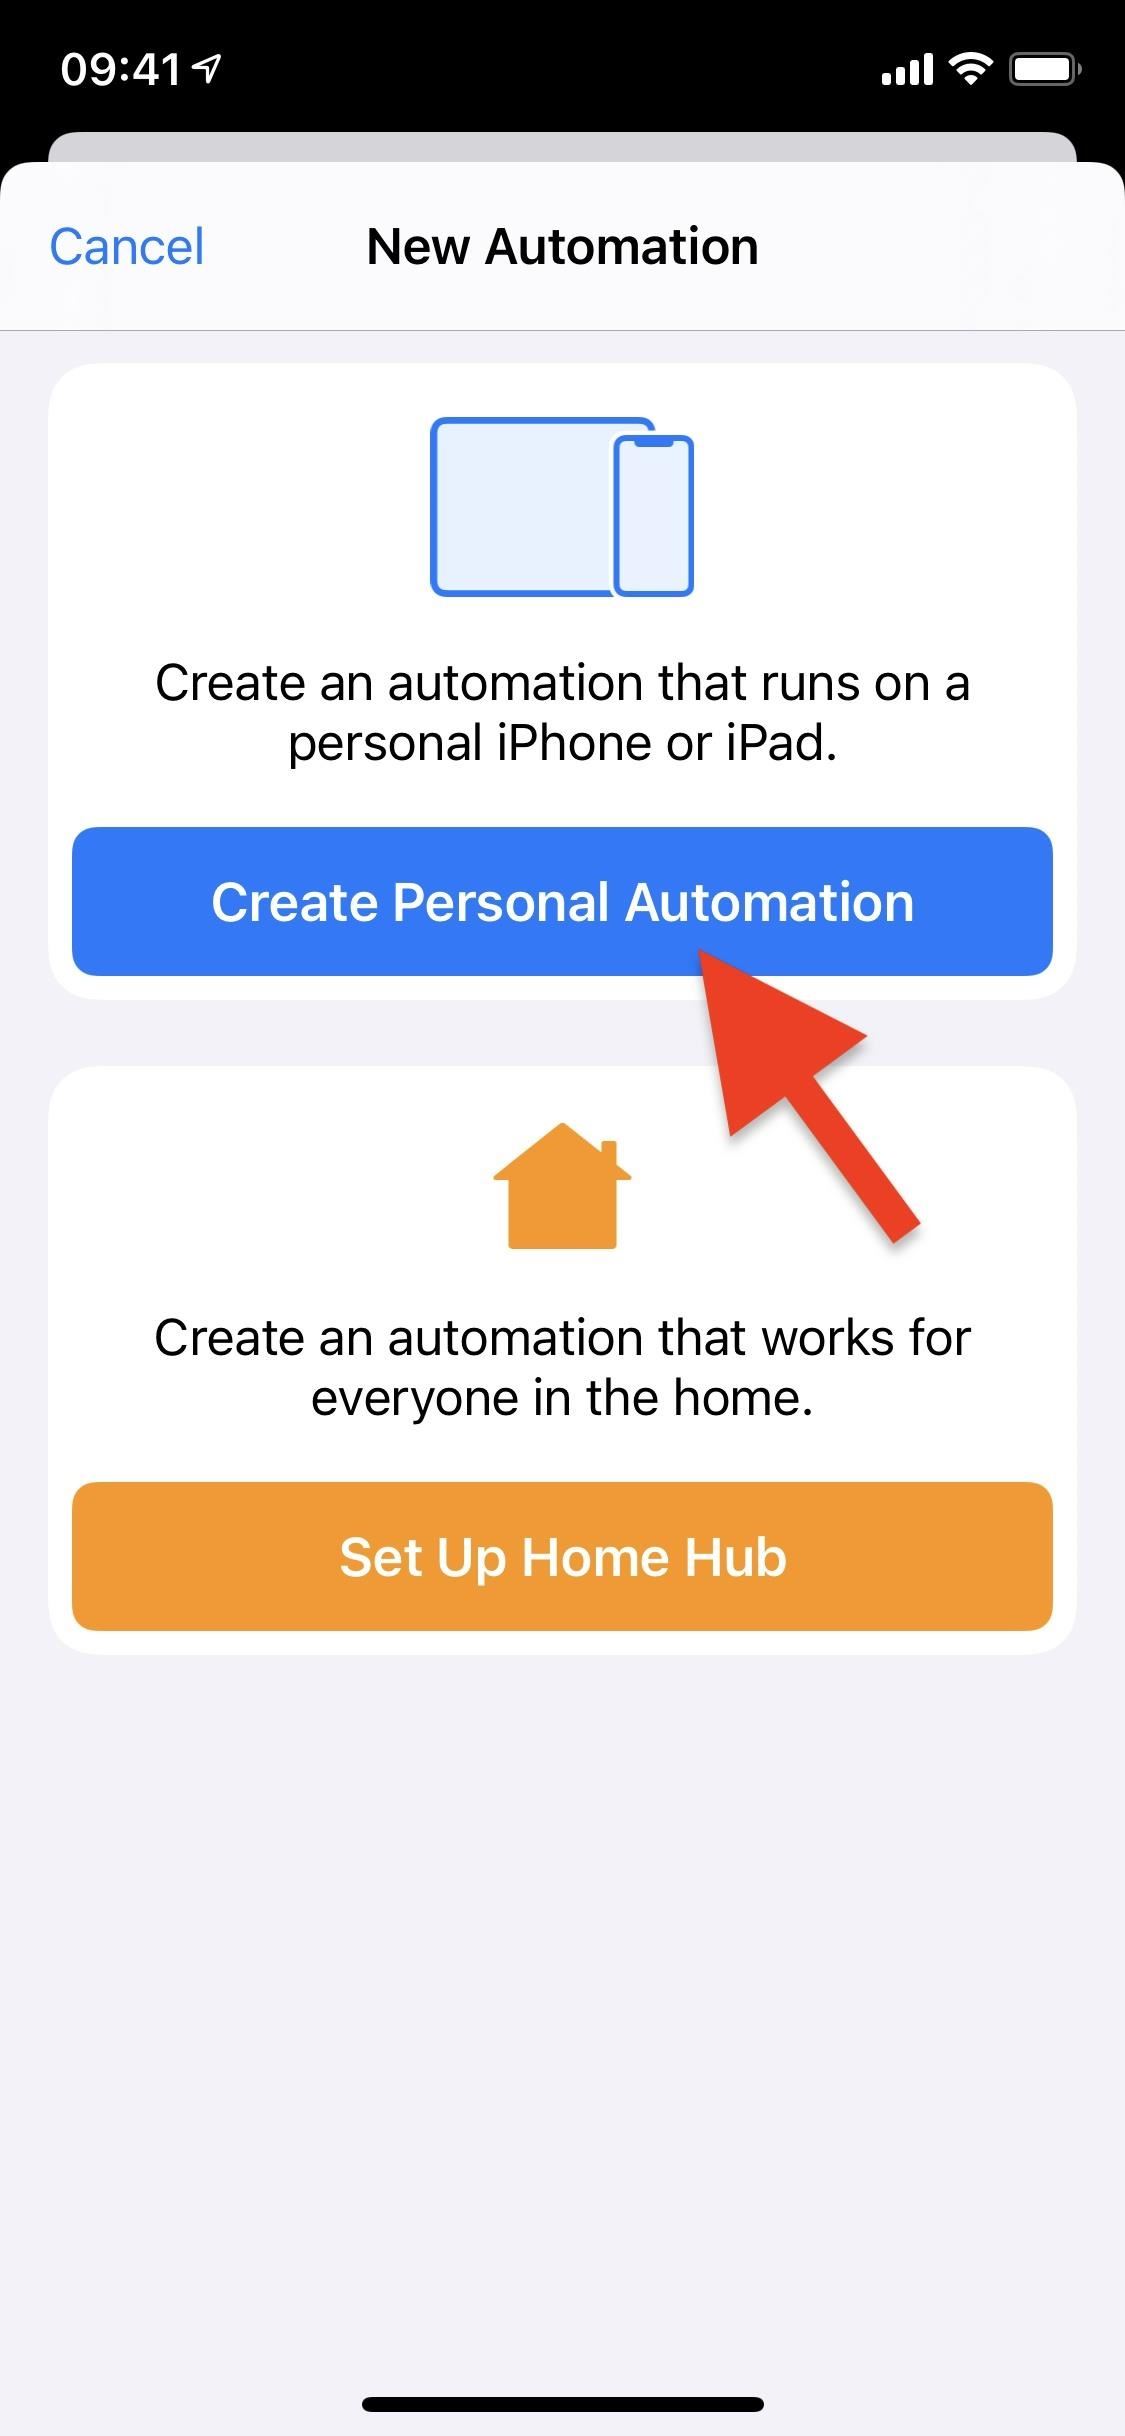
One way that you can make the shortcut better is to automatically trigger it every day so that you don't have to remember to do it. To automate the shortcut, visit the "Automation" tab in Shortcuts. Next, if you don't have any automation yet, tap "Create Personal Automation." If you do, tap the plus (+) icon first, then "Create Personal Automation."
Now, choose a trigger. This can be pretty much anything, such as stopping an alarm clock in the morning or disabling Do Not Disturb, but we'll be choosing "Time of Day," which runs the shortcut at whatever time you type in. You can pick "Sunrise" or "Sunset," or you can use "Time of Day" and use the time picker to set it to when you want. Then, select how often you want it to run: "Daily," "Weekly," or "Monthly." Hit "Next" up top when you're finished.


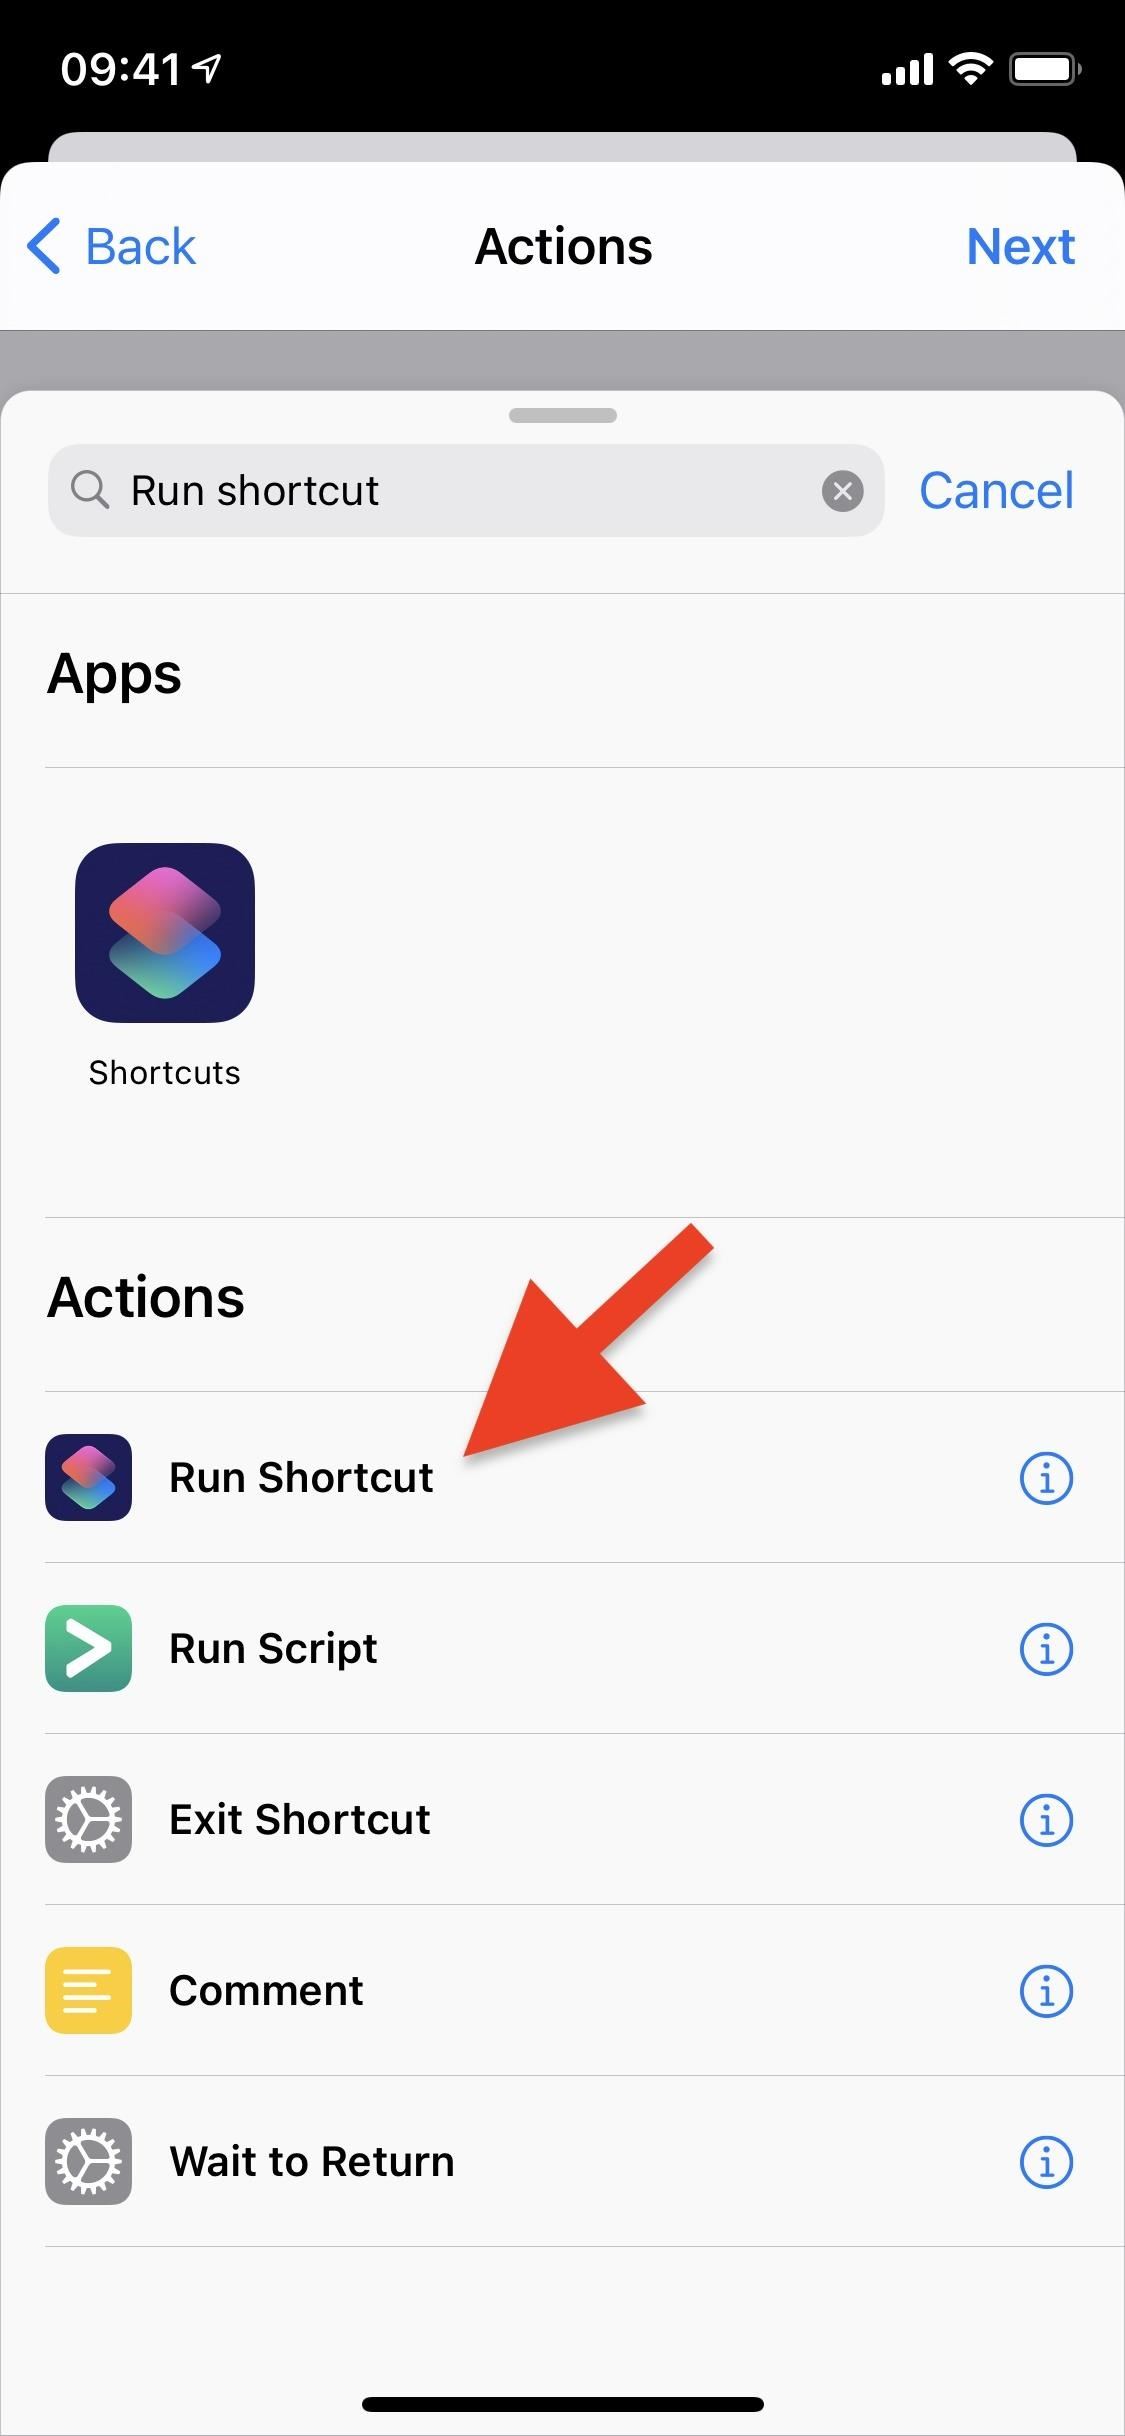
Tap on "Add Action," then type in "run shortcut" in the search field. This will bring up several options — tap on "Run Shortcut" from the results.

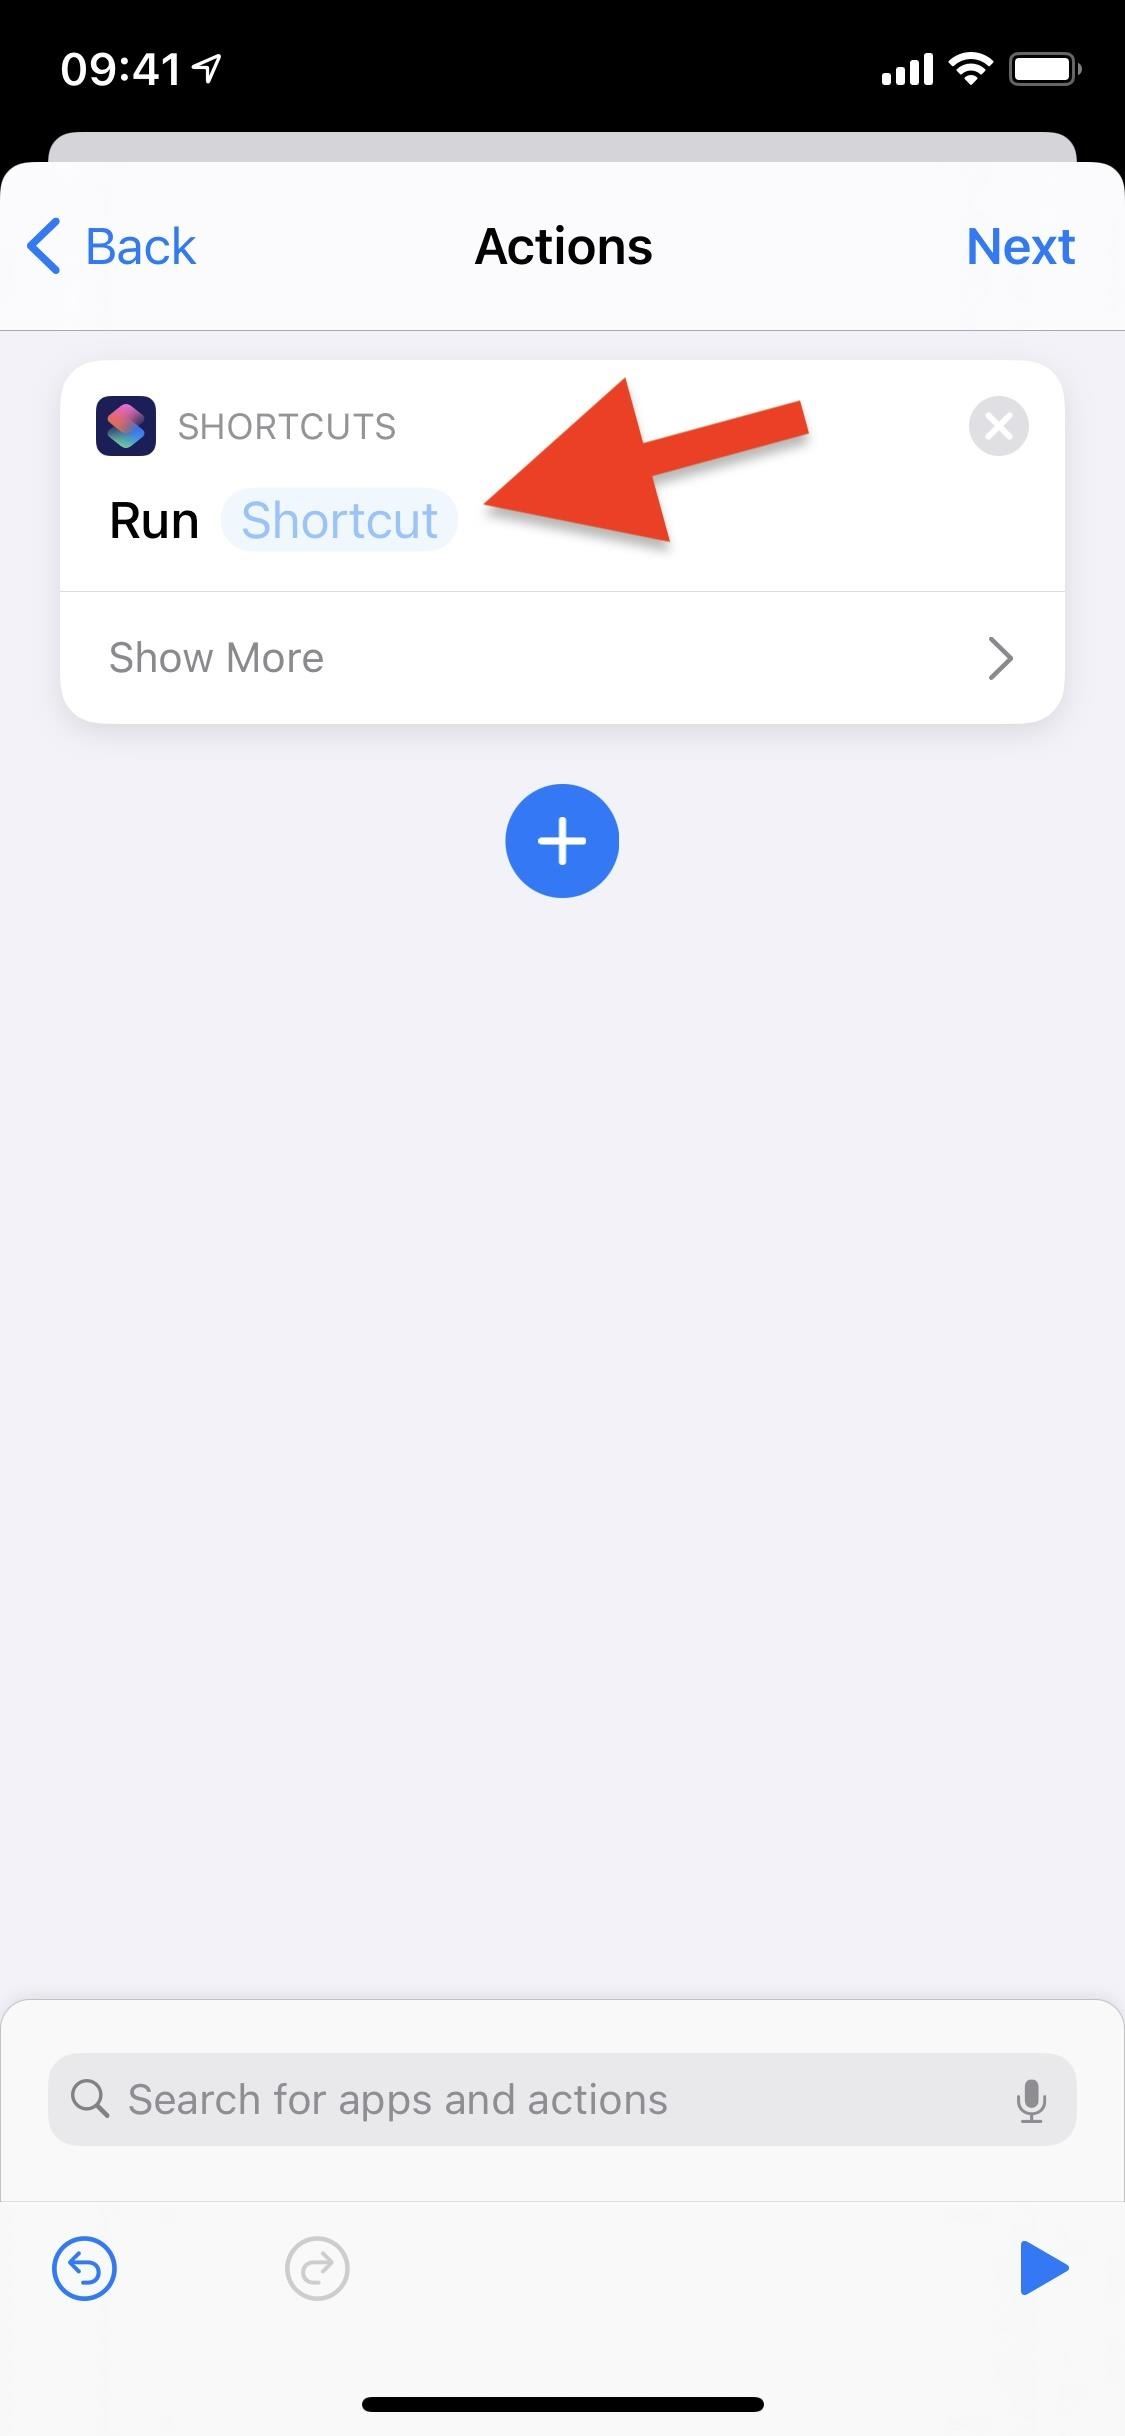
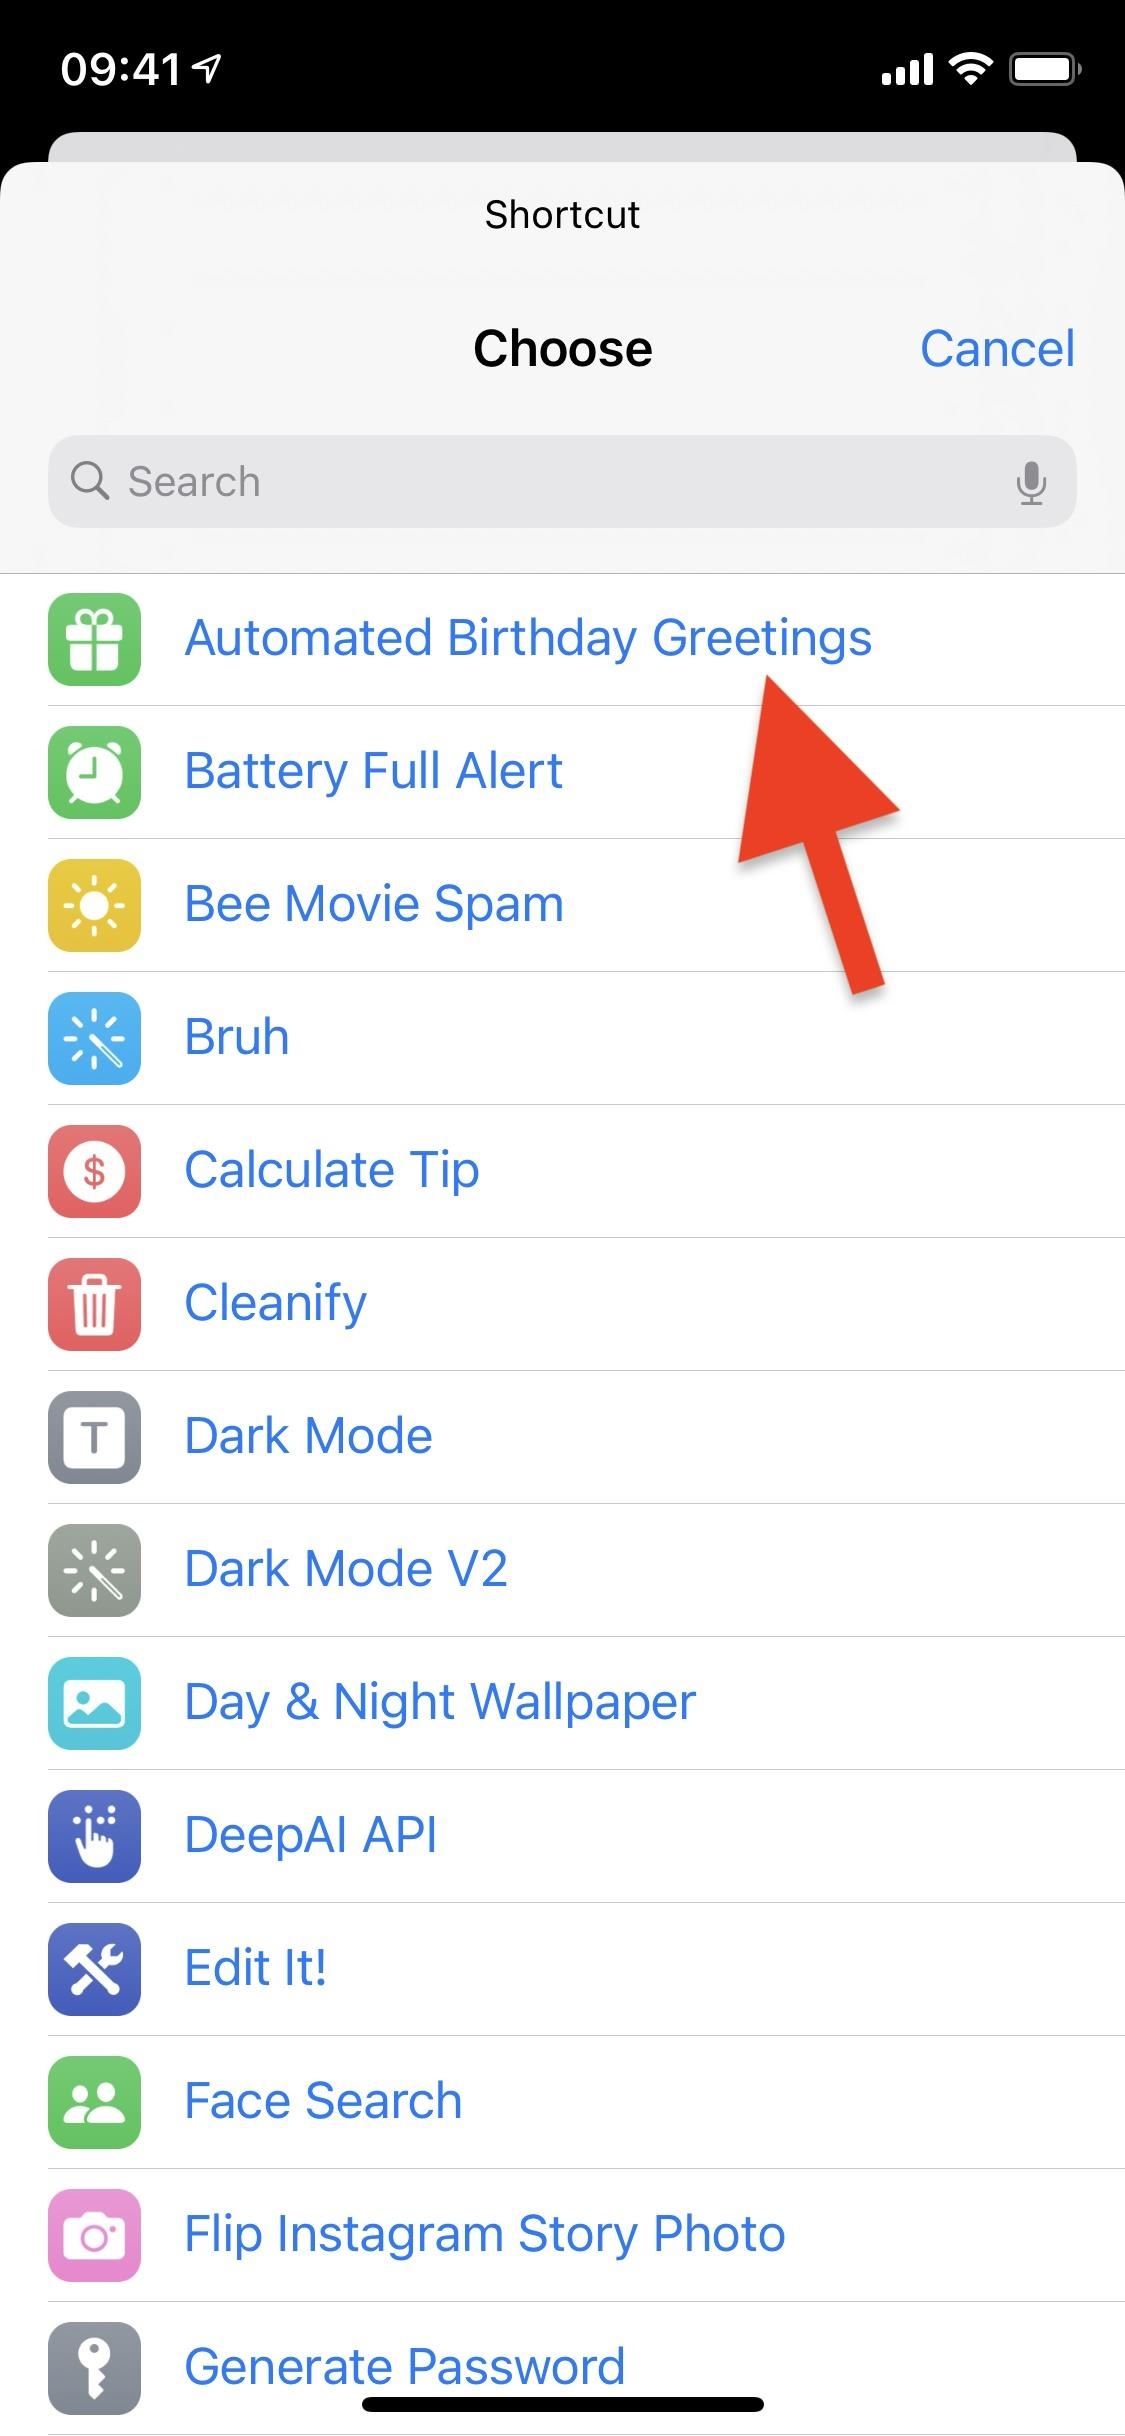
Once the Shortcut action box appears, tap on "Shortcut" in the blue bubble. From the list of shortcuts that appear, tap on "Automated Birthday Greetings."
The shortcut box should now say, "Run Automated Birthday Greetings." Hit "Next" and look over your newly automated shortcut. If you don't want the shortcut to ask you before it runs, so that it genuinely runs automatically, disable "Ask Before Running."
Once you're happy with your settings, tap on "Done" to create the automation. The shortcut will live on the Automations page in Shortcuts, where you can toggle and adjust any settings in the future, and it will run every time your trigger is satisfied.
Keep Your Connection Secure Without a Monthly Bill. Get a lifetime subscription to VPN Unlimited for all your devices with a one-time purchase from the new Gadget Hacks Shop, and watch Hulu or Netflix without regional restrictions.
Buy Now (80% off) >
tinyurlis.gdu.nuclck.ruulvis.netshrtco.de